请我喝杯咖啡☕
*我的帖子解释了移动 mnist。
movingmnist() 可以使用 moving mnist 数据集,如下所示:
*备忘录:
from torchvision.datasets import movingmnist
all_data = movingmnist(
root="data"
)
all_data = movingmnist(
root="data",
split=none,
split_ratio=10,
download=false,
transform=none
)
train_data = movingmnist(
root="data",
split="train"
)
test_data = movingmnist(
root="data",
split="test"
)
len(all_data), len(train_data), len(test_data)
# (10000, 10000, 10000)
len(all_data[0]), len(train_data[0]), len(test_data[0])
# (20, 10, 10)
all_data
# dataset movingmnist
# number of datapoints: 10000
# root location: data
all_data.root
# 'data'
print(all_data.split)
# none
all_data.split_ratio
# 10
all_data.download
# <bound method movingmnist.download of dataset movingmnist
# number of datapoints: 10000
# root location: data>
print(all_data.transform)
# none
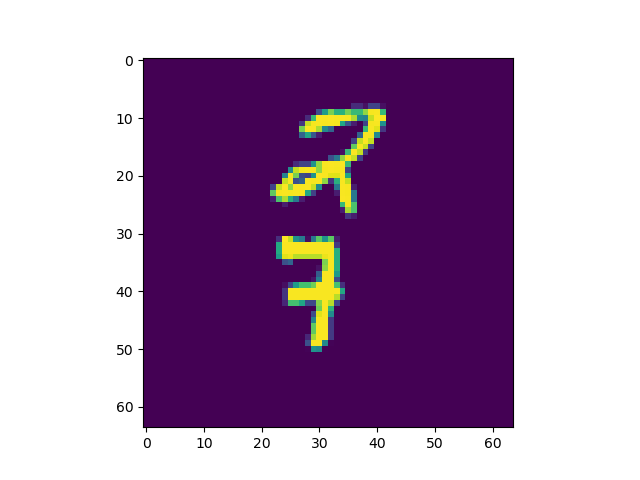
from torchvision.datasets import movingmnist
import matplotlib.pyplot as plt
plt.figure(figsize=(10, 3))
plt.subplot(1, 3, 1)
plt.title("all_data")
plt.imshow(all_data[0].squeeze()[0])
plt.subplot(1, 3, 2)
plt.title("train_data")
plt.imshow(train_data[0].squeeze()[0])
plt.subplot(1, 3, 3)
plt.title("test_data")
plt.imshow(test_data[0].squeeze()[0])
plt.show()

from torchvision.datasets import movingmnist
all_data = movingmnist(
root="data",
split=none
)
train_data = movingmnist(
root="data",
split="train"
)
test_data = movingmnist(
root="data",
split="test"
)
def show_images(data, main_title=none):
plt.figure(figsize=(10, 8))
plt.suptitle(t=main_title, y=1.0, fontsize=14)
for i, image in enumerate(data, start=1):
plt.subplot(4, 5, i)
plt.tight_layout(pad=1.0)
plt.title(i)
plt.imshow(image)
plt.show()
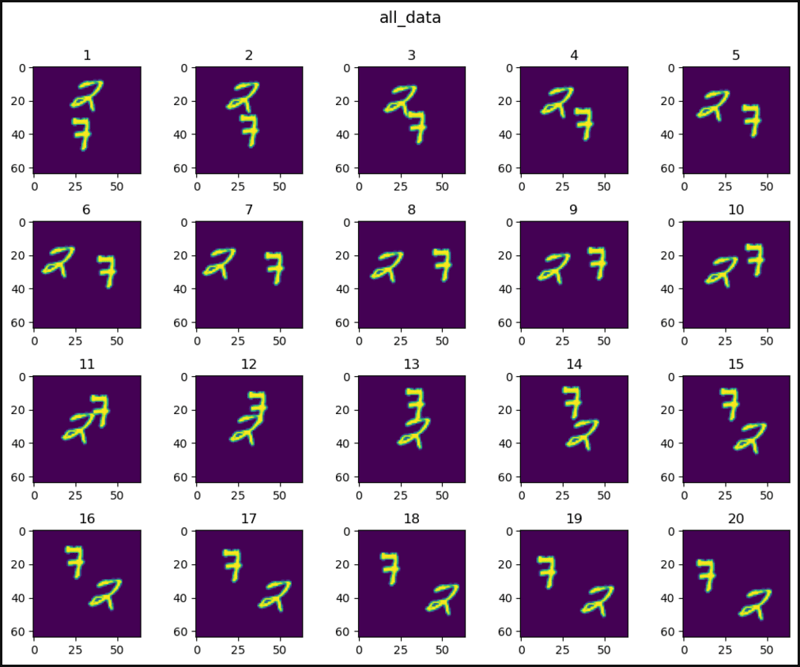
show_images(data=all_data[0].squeeze(), main_title="all_data")
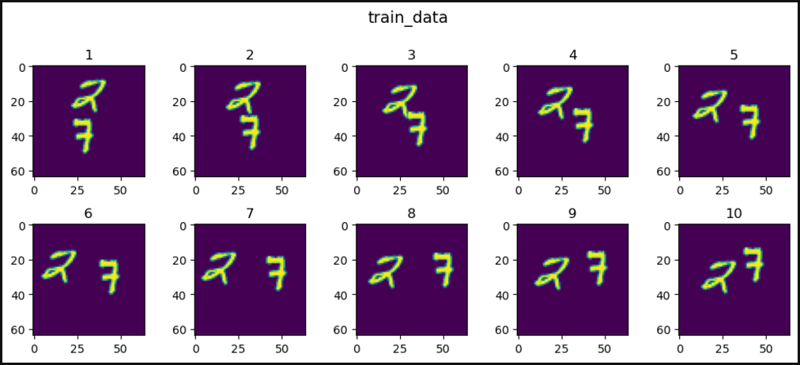
show_images(data=train_data[0].squeeze(), main_title="train_data")
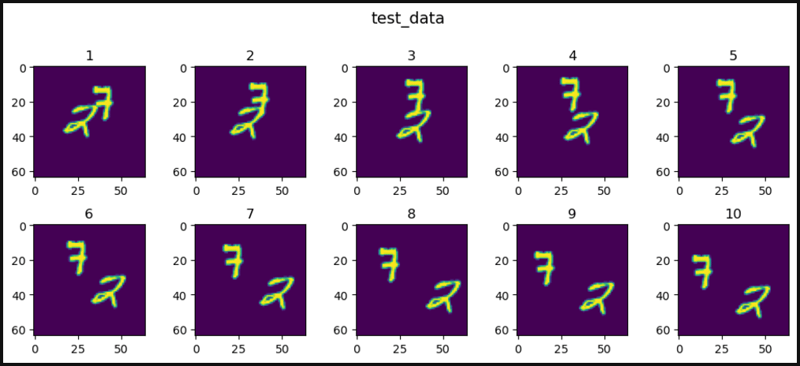
show_images(data=test_data[0].squeeze(), main_title="test_data")

微信小程序是一种轻量级的应用开发平台,由腾讯公司推出,主要应用于移动端,旨在提供便捷的用户体验,无需下载安装即可在微信内使用。本压缩包包含了丰富的源码资源,涵盖了多个领域的应用场景,下面将逐一介绍其中涉及的知识点。1. 图片展示:这部分源码可能涉及了微信小程序中的``组件的使用,用于显示图片,以及`wx.getSystemInfo`接口获取屏幕尺寸,实现图片的适配和响应式布局。可能还包括了图片懒加
 0
0

from torchvision.datasets import movingmnist
all_data = movingmnist(
root="data",
split=none
)
train_data = movingmnist(
root="data",
split="train"
)
test_data = movingmnist(
root="data",
split="test"
)
import matplotlib.pyplot as plt
def show_images(data, main_title=none):
plt.figure(figsize=(10, 8))
plt.suptitle(t=main_title, y=1.0, fontsize=14)
col = 5
for i, image in enumerate(data, start=1):
plt.subplot(4, 5, i)
plt.tight_layout(pad=1.0)
plt.title(i)
plt.imshow(image.squeeze()[0])
if i == col:
break
plt.show()
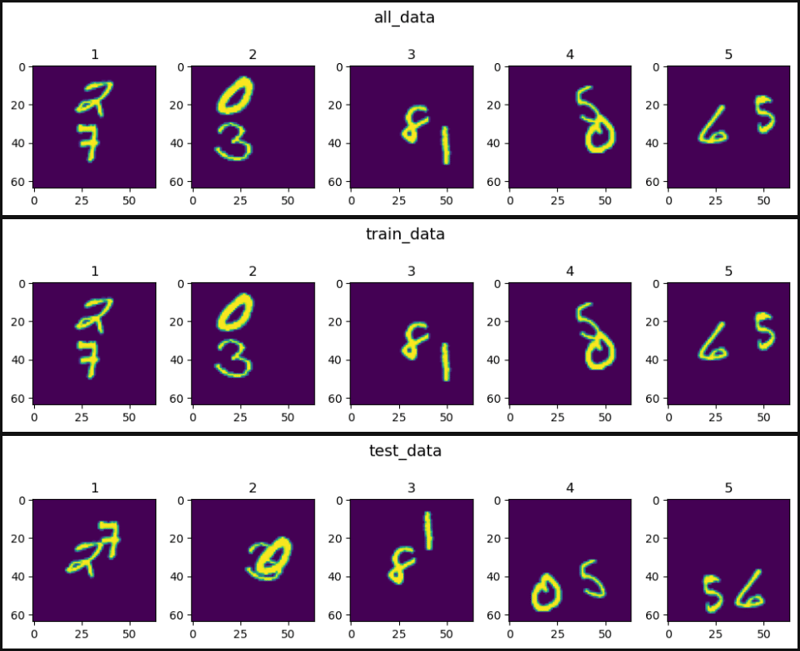
show_images(data=all_data, main_title="all_data")
show_images(data=train_data, main_title="train_data")
show_images(data=test_data, main_title="test_data")
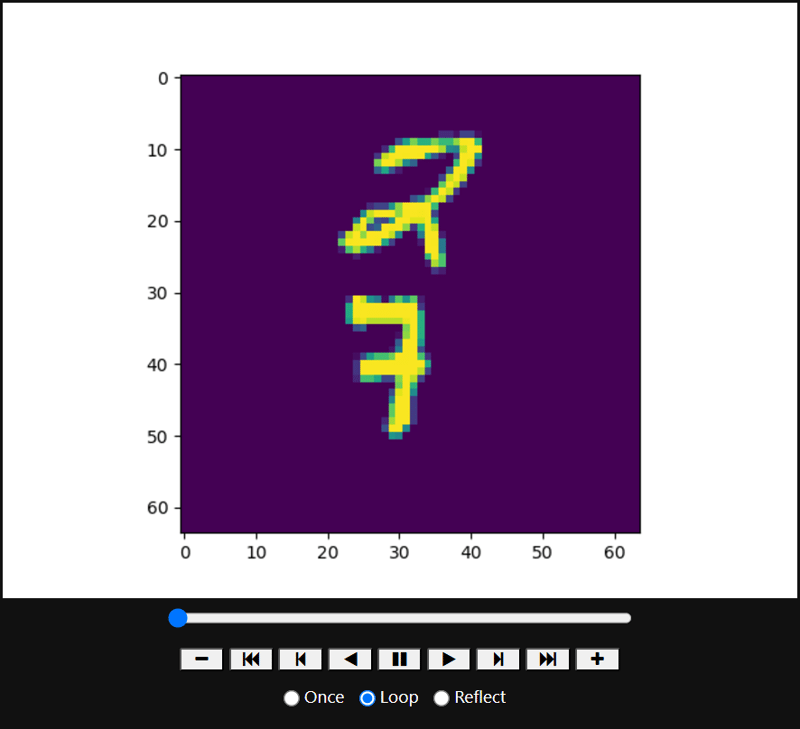
from torchvision.datasets import movingmnist
import matplotlib.animation as animation

all_data = movingmnist(
    root="data"
)

import matplotlib.pyplot as plt
from ipython.display import html

figure, axis = plt.subplots()

# ↓ ↓ ↓ ↓ ↓ ↓ ↓ ↓ ↓ ↓ `artistanimation()` ↓ ↓ ↓ ↓ ↓ ↓ ↓ ↓ ↓ ↓
images = []
for image in all_data[0].squeeze():
    images.append([axis.imshow(image)])
ani = animation.artistanimation(fig=figure, artists=images,
                                interval=100)
# ↑ ↑ ↑ ↑ ↑ ↑ ↑ ↑ ↑ ↑ `artistanimation()` ↑ ↑ ↑ ↑ ↑ ↑ ↑ ↑ ↑ ↑

# ↓ ↓ ↓ ↓ ↓ ↓ ↓ ↓ ↓ `funcanimation()` ↓ ↓ ↓ ↓ ↓ ↓ ↓ ↓ ↓
# def animate(i):
#     axis.imshow(all_data[0].squeeze()[i])
#
# ani = animation.funcanimation(fig=figure, func=animate,
#                               frames=20, interval=100)
# ↑ ↑ ↑ ↑ ↑ ↑ ↑ ↑ ↑ `funcanimation()` ↑ ↑ ↑ ↑ ↑ ↑ ↑ ↑ ↑

# ani.save('result.gif') # save the animation as a `.gif` file

plt.ioff() # hide a useless image

# ↓ ↓ ↓ ↓ ↓ ↓ ↓ ↓ show animation ↓ ↓ ↓ ↓ ↓ ↓ ↓ ↓
html(ani.to_jshtml()) # animation operator
# html(ani.to_html5_video()) # animation video
# ↑ ↑ ↑ ↑ ↑ ↑ ↑ ↑ show animation ↑ ↑ ↑ ↑ ↑ ↑ ↑ ↑

# ↓ ↓ ↓ ↓ ↓ ↓ ↓ ↓ ↓ ↓ ↓ ↓ show animation ↓ ↓ ↓ ↓ ↓ ↓ ↓ ↓ ↓ ↓ ↓ ↓
# plt.rcparams["animation.html"] = "jshtml" # animation operator
# plt.rcparams["animation.html"] = "html5" # animation video
# ↑ ↑ ↑ ↑ ↑ ↑ ↑ ↑ ↑ ↑ ↑ ↑ show animation ↑ ↑ ↑ ↑ ↑ ↑ ↑ ↑ ↑ ↑ ↑ ↑
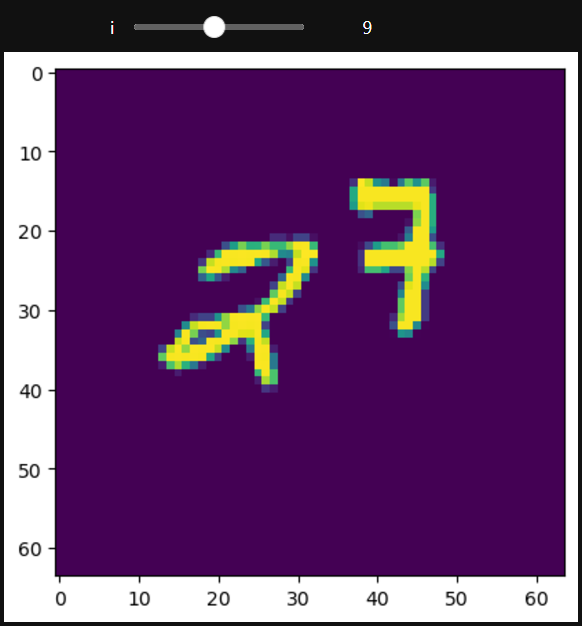
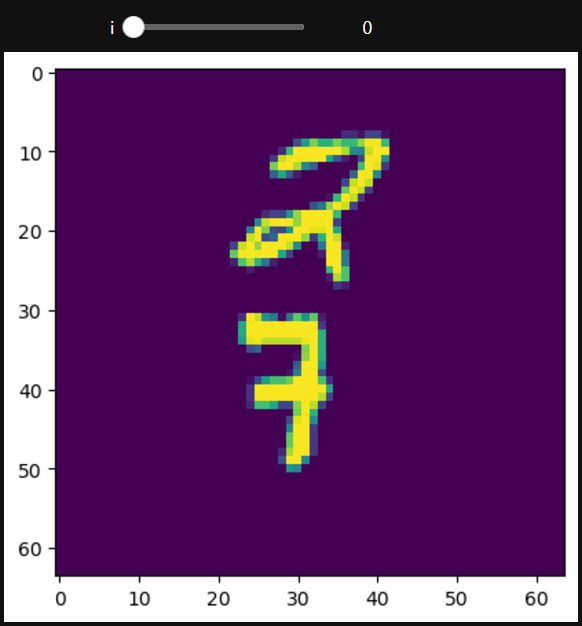
from torchvision.datasets import MovingMNIST
from ipywidgets import interact, IntSlider

all_data = MovingMNIST(
    root="data"
)

import matplotlib.pyplot as plt
from IPython.display import HTML

def func(i):
    plt.imshow(all_data[0].squeeze()[i])

interact(func, i=(0, 19, 1))
# interact(func, i=IntSlider(min=0, max=19, step=1, value=0))
# ↑ ↑ ↑ ↑ ↑ ↑ ↑ ↑ ↑ ↑ Set the start value ↑ ↑ ↑ ↑ ↑ ↑ ↑ ↑ ↑ ↑
plt.show()
以上就是在 PyTorch 中移动 MNIST的详细内容,更多请关注php中文网其它相关文章!

每个人都需要一台速度更快、更稳定的 PC。随着时间的推移,垃圾文件、旧注册表数据和不必要的后台进程会占用资源并降低性能。幸运的是,许多工具可以让 Windows 保持平稳运行。

 广告
广告Copyright 2014-2025 https://www.php.cn/ All Rights Reserved | php.cn | 湘ICP备2023035733号


 226
226