本文基于LightGBM实现银行客户信用违约预测。先读取训练集和测试集数据,处理Credit_Product列缺失值为“ No ”。经数据EDA后,用LabelEncoder对离散变量编码。构建LGBM模型,通过5折交叉验证训练,验证集平均AUC为0.7889,最后输出预测结果为指定格式的CSV文件。
☞☞☞AI 智能聊天, 问答助手, AI 智能搜索, 免费无限量使用 DeepSeek R1 模型☜☜☜

题目地址:Coggle竞赛
信用评分卡(金融风控)是金融行业和通讯行业常见的风控手段,通过对客户提交的个人信息和数据来预测未来违约的可能性。对客户进行信用评分是一个常见的分类问题。
在本次赛题中需要参赛选手建立机器学习模型来预测申请人是“好”还是“坏”客户,与其他任务不同,没有给出“好”或“坏”的定义。 您应该使用一些技术,例如年份分析来构建您的标签。
赛题包含两部分训练集和测试集,选手需要在训练集上进行搭建模型,然后在测试集进行预测。
数据字段介绍如下:
评分使用准确率进行评分,准确率值越大越好。
提交格式样例:
ID,TargetAXM2EH3R,18ETNJAUW,1VCSJTEPW,09EOYOOHV,0
学习自:
通过pandas读取数据
import pandas as pdimport numpy as np
df=pd.read_csv("data/data207852/train.csv")
test=pd.read_csv("data/data207852/test.csv")
test.head(10)ID Gender Age Region_Code Occupation Channel_Code Vintage \ 0 AXM2EH3R Female 43 RG284 Self_Employed X3 26 1 8ETNJAUW Female 46 RG282 Self_Employed X2 14 2 VCSJTEPW Female 28 RG254 Self_Employed X1 15 3 9EOYOOHV Male 58 RG265 Other X3 15 4 S4B53OKJ Male 75 RG260 Other X3 111 5 3DTSVD9Y Female 51 RG268 Self_Employed X1 57 6 8WYWQUUX Male 32 RG279 Salaried X1 33 7 FPQTNHGY Female 38 RG270 Salaried X1 33 8 UXCKDQ34 Male 56 RG254 Self_Employed X2 62 9 CFTGOZHH Female 29 RG283 Salaried X1 20 Credit_Product Avg_Account_Balance Is_Active 0 Yes 1325325 Yes 1 No 634489 No 2 No 2215655 No 3 Yes 925929 Yes 4 No 721825 Yes 5 No 490345 No 6 No 650483 No 7 NaN 369777 No 8 Yes 2406880 Yes 9 No 659053 No
df.head(10)
         ID  Gender  Age Region_Code     Occupation Channel_Code  Vintage  \
0  ZYFGCP3R    Male   58       RG264  Self_Employed           X2       19
1  MQJBCRCF  Female   45       RG271  Self_Employed           X3      104
2  UZOQRG46  Female   30       RG278          Other           X1       25
3  GCX6RVZS  Female   52       RG283  Self_Employed           X1       43
4  9V6BRARI  Female   76       RG254          Other           X1       57
5  WUGN99OM    Male   28       RG275       Salaried           X1       33
6  EQ4CBNED    Male   31       RG268       Salaried           X1       33
7  JZZ7MPIR    Male   48       RG259   Entrepreneur           X2       67
8  KVHMRSES  Female   31       RG254       Salaried           X1       33
9  KS45GJCT  Female   48       RG273          Other           X3      105

  Credit_Product  Avg_Account_Balance Is_Active  Target
0             No               552449       Yes       0
1            Yes               525206        No       1
2             No               724718        No       0
3            Yes              1452453        No       0
4             No              1895762        No       0
5             No               885576        No       0
6             No               653135       Yes       0
7            Yes               389553       Yes       1
8             No              1543001        No       0
9            NaN               360005       Yes       1
df.info()
<class 'pandas.core.frame.DataFrame'>
RangeIndex: 195725 entries, 0 to 195724
Data columns (total 11 columns):
 #   Column               Non-Null Count   Dtype
---  ------               --------------   -----
 0   ID                   195725 non-null  object
 1   Gender               195725 non-null  object
 2   Age                  195725 non-null  int64
 3   Region_Code          195725 non-null  object
 4   Occupation           195725 non-null  object
 5   Channel_Code         195725 non-null  object
 6   Vintage              195725 non-null  int64
 7   Credit_Product       172279 non-null  object
 8   Avg_Account_Balance  195725 non-null  int64
 9   Is_Active            195725 non-null  object
 10  Target               195725 non-null  int64
dtypes: int64(4), object(7)
memory usage: 16.4+ MB
发现Credit_Product列有空值,怎么办?仔细一看test也有空值,不能简单的删除了,那就看这个值哪个多就填写哪个了。
# 统计某列值 df['Credit_Product'].unique()
array(['No', 'Yes', nan], dtype=object)
# 统计某列出现某值的次数 df['Credit_Product'].value_counts()
No     114910
Yes     57369
Name: Credit_Product, dtype: int64
可以看出,该列值主要为No,因此缺失值nan设置为No。
test.info()
<class 'pandas.core.frame.DataFrame'>
RangeIndex: 50000 entries, 0 to 49999
Data columns (total 10 columns):
 #   Column               Non-Null Count  Dtype
---  ------               --------------  -----
 0   ID                   50000 non-null  object
 1   Gender               50000 non-null  object
 2   Age                  50000 non-null  int64
 3   Region_Code          50000 non-null  object
 4   Occupation           50000 non-null  object
 5   Channel_Code         50000 non-null  object
 6   Vintage              50000 non-null  int64
 7   Credit_Product       44121 non-null  object
 8   Avg_Account_Balance  50000 non-null  int64
 9   Is_Active            50000 non-null  object
dtypes: int64(3), object(7)
memory usage: 3.8+ MB
# 空值填Nodf=df.fillna('No')
test=test.fillna('No')import matplotlib.pyplot as plt
import seaborn as sns
%matplotlib inline# 按年龄分布查看ages=[22,30,40,50,60,70,80,90]
df1=df[df['Credit_Product']=='Yes']
binning=pd.cut(df1['Age'],ages,right=False)
time=pd.value_counts(binning)# 可视化time=time.sort_index()
fig=plt.figure(figsize=(6,2),dpi=120)
sns.barplot(time.index,time,color='royalblue')
x=np.arange(len(time))
y=time.valuesfor x_loc,jobs in zip(x,y):
plt.text(x_loc, jobs+2, '{:.1f}%'.format(jobs/sum(time)*100), ha='center', va= 'bottom',fontsize=8)
plt.xticks(fontsize=8)
plt.yticks([])
plt.ylabel('')
plt.title('duration_yes',size=8)
sns.despine(left=True)
plt.show()<Figure size 720x240 with 1 Axes>
# 分离数值变量与分类变量Nu_feature = list(df.select_dtypes(exclude=['object']).columns)
Ca_feature = list(df.select_dtypes(include=['object']).columns)#查看训练集与测试集数值变量分布import matplotlib.pyplot as plt
import seaborn as snsimport warnings
warnings.filterwarnings("ignore")
plt.figure(figsize=(15,5))

Nu_feature.remove('Target')# 根据数值型分布查看i=1for col in Nu_feature:
    ax=plt.subplot(1,3,i)
    ax=sns.kdeplot(df[col],color='red')
    ax=sns.kdeplot(test[col],color='cyan')
    ax.set_xlabel(col)
    ax.set_ylabel('Frequency')
    ax=ax.legend(['train','test'])
i+=1plt.show()<Figure size 1500x500 with 3 Axes>
查看离散变量分布
由于时间太久,故不测
col1=Ca_feature
plt.figure(figsize=(20,10))j=1for col in col1:    ax=plt.subplot(6,3,j)    ax=plt.scatter(x=range(len(df)),y=df[col],color='red')
    plt.title(col)
    j+=1k=7for col in col1:    ax=plt.subplot(6,3,k)    ax=plt.scatter(x=range(len(test)),y=test[col],color='cyan')
    plt.title(col)
    k+=1
plt.subplots_adjust(wspace=0.4,hspace=0.3)
plt.show()# 离散数据Encoderfrom sklearn.preprocessing import LabelEncoder
lb = LabelEncoder()
cols = Ca_featurefor m in cols:
df[m] = lb.fit_transform(df[m])
test[m] = lb.fit_transform(test[m])
correlation_matrix=df.corr()
plt.figure(figsize=(12,10))# 热力图sns.heatmap(correlation_matrix,vmax=0.9,linewidths=0.05,cmap="RdGy")<matplotlib.axes._subplots.AxesSubplot at 0x7fa254ac6150>
<Figure size 1200x1000 with 2 Axes>
这里使用留出法划分数据集,将数据集分为自变量和因变量。
按比例切割训练集和测试集(一般测试集的比例有30%、25%、20%、15%和10%),使用分层抽样,设置随机种子以便结果能复现
from lightgbm.sklearn import LGBMClassifierfrom sklearn.model_selection import train_test_splitfrom sklearn.model_selection import KFoldfrom sklearn.metrics import accuracy_score, auc, roc_auc_score

X=df.drop(columns=['ID','Target'])
Y=df['Target']
test=test.drop(columns='ID')# 划分训练及测试集x_train,x_test,y_train,y_test = train_test_split( X, Y,test_size=0.3,random_state=1)
创建基于树的分类模型(lightgbm)
这些模型进行训练,分别的到训练集和测试集的得分
# 建立模型gbm = LGBMClassifier(n_estimators=600,learning_rate=0.01,boosting_type= 'gbdt',
    objective = 'binary',
    max_depth = -1,
    random_state=2022,
metric='auc')交叉验证介绍
# 交叉验证result1 = []
mean_score1 = 0n_folds=5kf = KFold(n_splits=n_folds ,shuffle=True,random_state=2022)for train_index, test_index in kf.split(X):
    x_train = X.iloc[train_index]
    y_train = Y.iloc[train_index]
    x_test = X.iloc[test_index]
    y_test = Y.iloc[test_index]
    gbm.fit(x_train,y_train)
    y_pred1=gbm.predict_proba((x_test),num_iteration=gbm.best_iteration_)[:,1]    print('验证集AUC:{}'.format(roc_auc_score(y_test,y_pred1)))
    mean_score1 += roc_auc_score(y_test,y_pred1)/ n_folds
    y_pred_final1 = gbm.predict_proba((test),num_iteration=gbm.best_iteration_)[:,1]
    y_pred_test1=y_pred_final1
result1.append(y_pred_test1)验证集AUC:0.7889931707362382 验证集AUC:0.7894677985120346 验证集AUC:0.7931272562656144 验证集AUC:0.7850546301430752 验证集AUC:0.7876841341097264
# 模型评估print('mean 验证集auc:{}'.format(mean_score1))
cat_pre1=sum(result1)/n_foldsmean 验证集auc:0.7888653979533378
将预测结果按照指定格式输出到result.csv文件中
ret1=pd.DataFrame(cat_pre1,columns=['Target'])
ret1['Target']=np.where(ret1['Target']>0.5,'1','0').astype('str')

result = pd.DataFrame()
test=pd.read_csv("data/data207852/test.csv")
result['ID'] = test['ID']
result['Target'] = ret1['Target']

result.to_csv('result.csv',index=False)print(test.columns)
Index(['ID', 'Gender', 'Age', 'Region_Code', 'Occupation', 'Channel_Code',
       'Vintage', 'Credit_Product', 'Avg_Account_Balance', 'Is_Active'],
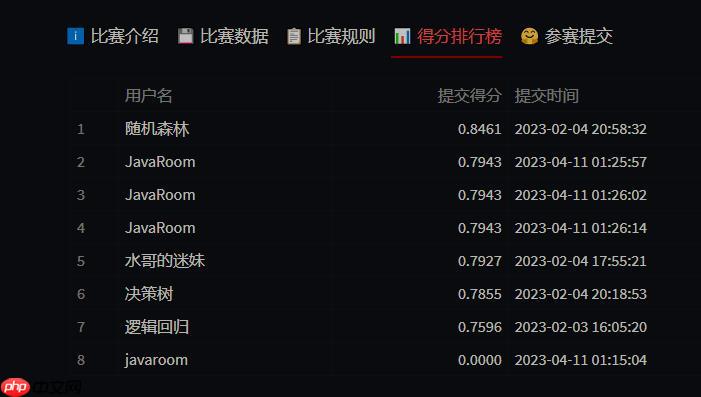
dtype='object')第一次提交错了,第二次刷新过头了

以上就是基于LightGBM实现银行客户信用违约预测的详细内容,更多请关注php中文网其它相关文章!

Copyright 2014-2025 https://www.php.cn/ All Rights Reserved | php.cn | 湘ICP备2023035733号