本文主要介绍了js实现鼠标拖动功能的实例代码。具有很好的参考价值。下面跟着小编一起来看下吧
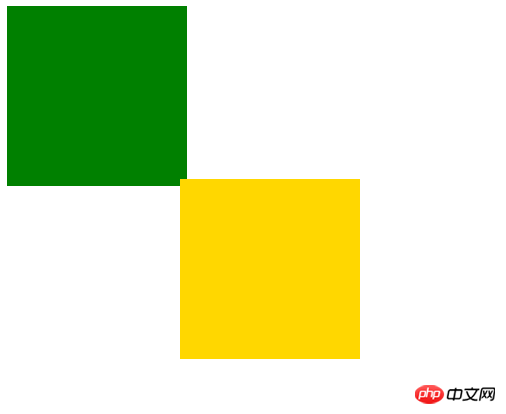
效果图:
代码如下:
<!DOCTYPE html>
<html>
 <head>
 <meta charset="UTF-8">
 <title></title>
 <style type="text/css">
  #p{
  width: 200px;
  height: 200px;
  background: green;
  position: absolute;
  }
  #p2{
  width: 200px;
  height: 200px;
  background: gold;
  position: absolute;
  top: 200px;
  left: 200px;
  }
 </style>
 </head>
 <body>
 <p id="p">
 </p>
 <p id="p2"></p>
 <script>
  window.onload=function(){
  var p=document.getElementById("p");
  p.onmousedown=function(ev){
   var e=window.event || ev;
   //var Myp=document.getElementById("p");
   //获取到鼠标点击的位置距离p左侧和顶部边框的距离;
   var oX=e.clientX-p.offsetLeft;
   var oY=e.clientY-p.offsetTop;
   //当鼠标移动,把鼠标的偏移量付给p
   document.onmousemove=function(ev){
   //计算出鼠标在XY方向上移动的偏移量,把这个偏移量加给p的左边距和上边距,p就会跟着移动
   var e=window.event|| ev;
   p.style.left=e.clientX-oX+"px";
   p.style.top=e.clientY-oY+"px";
   }
   //当鼠标按键抬起,清除移动事件
   document.onmouseup=function(){
   document.onmousemove=null;
   document.onmouseup=null;
   }
  }
  var p2=document.getElementById("p2");
  p2.onmousedown=function(ev){
   var e=window.event || ev;
   //var Myp=document.getElementById("p");
   //获取到鼠标点击的位置距离p左侧和顶部边框的距离;
   var oX=e.clientX-p2.offsetLeft;
   var oY=e.clientY-p2.offsetTop;
   //当鼠标移动,把鼠标的偏移量付给p
   document.onmousemove=function(ev){
   //计算出鼠标在XY方向上移动的偏移量,把这个偏移量加给p的左边距和上边距,p就会跟着移动
   var e=window.event|| ev;
   p2.style.left=e.clientX-oX+"px";
   p2.style.top=e.clientY-oY+"px";
   }
   //当鼠标按键抬起,清除移动事件
   document.onmouseup=function(){
   document.onmousemove=null;
   document.onmouseup=null;
   }
  }
  }
 </script>
 </body>
</html>以上就是js实现鼠标拖动功能的详细内容,更多请关注php中文网其它相关文章!

每个人都需要一台速度更快、更稳定的 PC。随着时间的推移,垃圾文件、旧注册表数据和不必要的后台进程会占用资源并降低性能。幸运的是,许多工具可以让 Windows 保持平稳运行。

 广告
广告

Copyright 2014-2025 https://www.php.cn/ All Rights Reserved | php.cn | 湘ICP备2023035733号


 908
908


