前言
这是一篇拖了很久就想写的备忘录,编写php扩展一百度都是文章,但是很多文章是很老的了。有的例子都跑不通。有点尴尬。
此文用于记录自己的笔记,当作备忘录。
下载地址:php下载快链
本文选取的是php-5.6.7安装包。
之后安装php。
//跑到ext目录cd php-5.6.7/ext///执行一键生成骨架的操作./ext_skel --extname=helloworld
如果看到以下提示说明创建成果 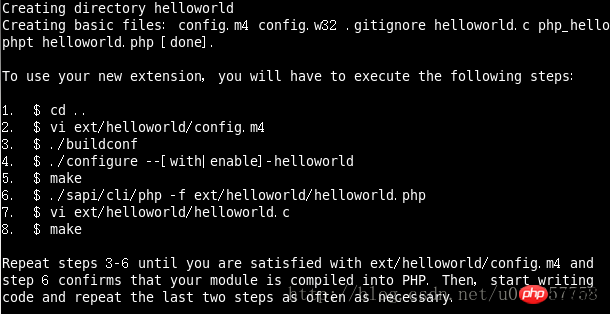
cd helloworld
ls
一下你会发现有如下文件:
立即学习“PHP免费学习笔记(深入)”;
config.m4 config.w32 CREDITS EXPERIMENTAL helloworld.c helloworld.php php_helloworld.h tests
去掉下面代码之前的dnl 。(dnl相当于php的//)
##动态编译选项,通过.so的方式链接,去掉dnl注释PHP_ARG_WITH(helloworld, for helloworld support,
Make sure that the comment is aligned:
[  --with-helloworld             Include helloworld support])##静态编译选项,通过enable来启用,去掉dnl注释PHP_ARG_ENABLE(helloworld, whether to enable helloworld support,
Make sure that the comment is aligned:
[  --enable-helloworld           Enable helloworld support])
一般二者选一即可(看个人喜好吧,本文教程必须去掉enable的注释)。
phpize
./configure --enable-helloworldmakemake install
然后到php.ini添加一下扩展
vim /usr/local/php/etc/php.ini// 添加扩展extension_dir = "/usr/local/php/lib/php/extensions/no-debug-non-zts-20131226/"extension = "helloworld.so"// 重启php-fpm/etc/init.d/php-fpm restart
回到写扩展的文件夹,执行测试命令
php -d enable_dl=On myfile.php
看到如下字样说明离胜利不远了:
confirm_helloworld_compiled

Congratulations! You have successfully modified ext/helloworld/config.m4. Module helloworld is now compiled into PHP.
confirm_helloworld_compiled是ext_skel自动生成的测试函数。
ps:如果本地安装了两个php版本,并且是用php7编写扩展的话,可能会遇到以下问题:
/mydata/src/php-7.0.0/ext/helloworld/helloworld.c: 在函数‘zif_confirm_helloworld_compiled’中:
/mydata/src/php-7.0.0/ext/helloworld/helloworld.c:58: 错误:‘zend_string’未声明(在此函数内第一次使用)
/mydata/src/php-7.0.0/ext/helloworld/helloworld.c:58: 错误:(即使在一个函数内多次出现,每个未声明的标识符在其
/mydata/src/php-7.0.0/ext/helloworld/helloworld.c:58: 错误:所在的函数内也只报告一次。)
/mydata/src/php-7.0.0/ext/helloworld/helloworld.c:58: 错误:‘strg’未声明(在此函数内第一次使用)
原因:编译的环境不是php7。
解决办法:php5 里面没有zend_string类型,用 char 替换,或者,修改你的php版本环境到php7
编辑helloworld.c,补充要实现的函数
##zend_function_entry helloworld_functions 补充要实现的函数const zend_function_entry helloworld_functions[] = {
    PHP_FE(confirm_helloworld_compiled, NULL)       /* For testing, remove later. */
    PHP_FE(helloworld,  NULL)       /* 这是补充的一行,尾巴没有逗号 */
PHP_FE_END /* Must be the last line in helloworld_functions[] */};找到”PHP_FUNCTION(confirm_helloworld_compiled)”,另起一个函数编写函数实体:
PHP_FUNCTION(helloworld) {    php_printf("Hello World!\n");
    RETURN_TRUE;
}再走一遍编译:
./configure --enable-helloworld && make && make install
测试一下是不是真的成功了:
php -d enable_dl=On -r "dl('helloworld.so');helloworld();"//输出Hello World!成功!
以上就是php扩展之关于hello world的详细介绍的详细内容,更多请关注php中文网其它相关文章!

PHP怎么学习?PHP怎么入门?PHP在哪学?PHP怎么学才快?不用担心,这里为大家提供了PHP速学教程(入门到精通),有需要的小伙伴保存下载就能学习啦!

 广告
广告Copyright 2014-2025 https://www.php.cn/ All Rights Reserved | php.cn | 湘ICP备2023035733号


 781
781