本篇文章给大家介绍一下纯css绘制一个爱心的方法。有一定的参考价值,有需要的朋友可以参考一下,希望对大家有所帮助。

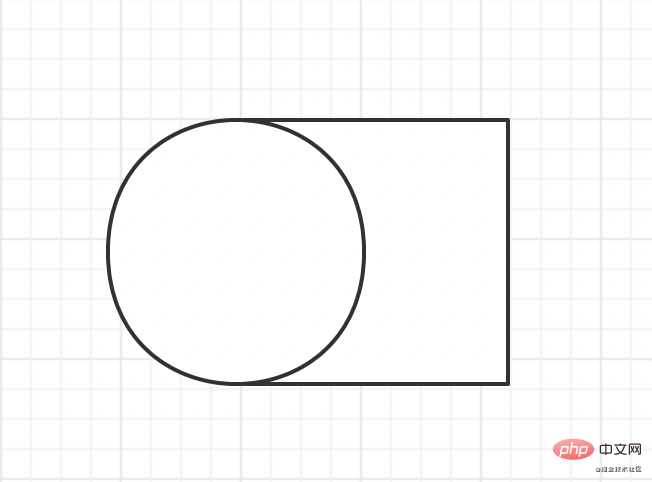
1、先画一个正方形+圆形, 摆放位置如下:
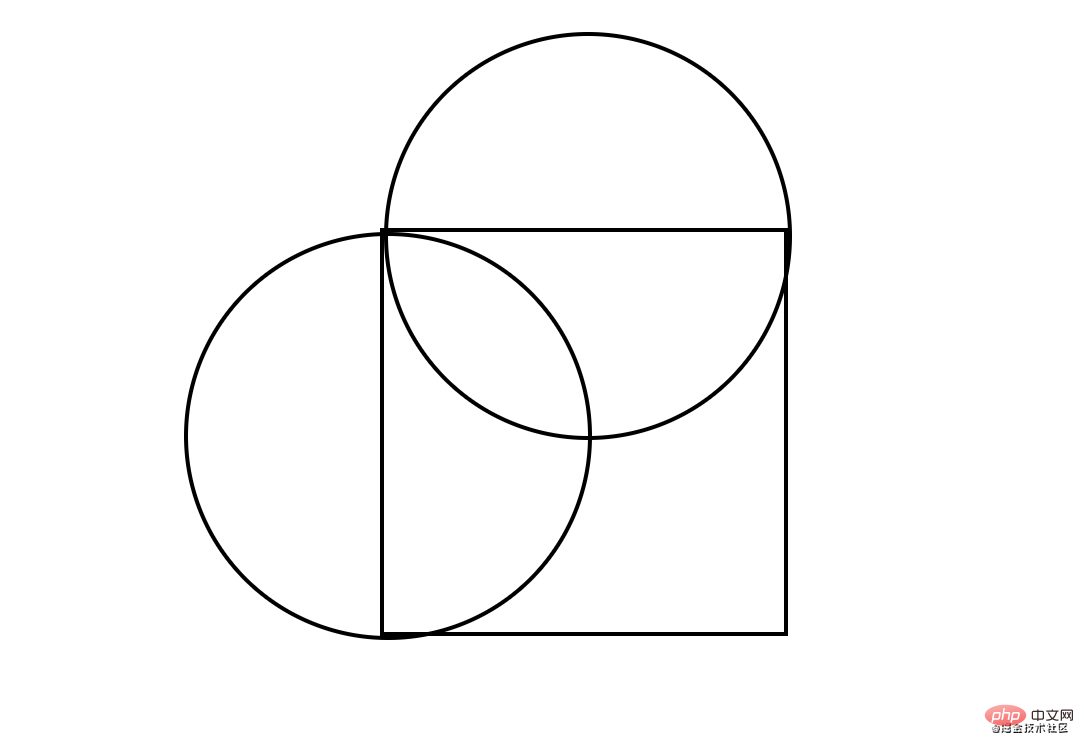
2、再添加上一个圆形.
立即学习“前端免费学习笔记(深入)”;
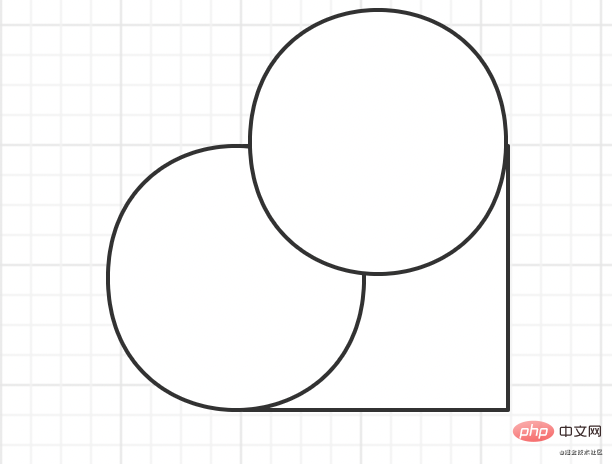
3、最后再将整个图形顺时针旋转45度即可.
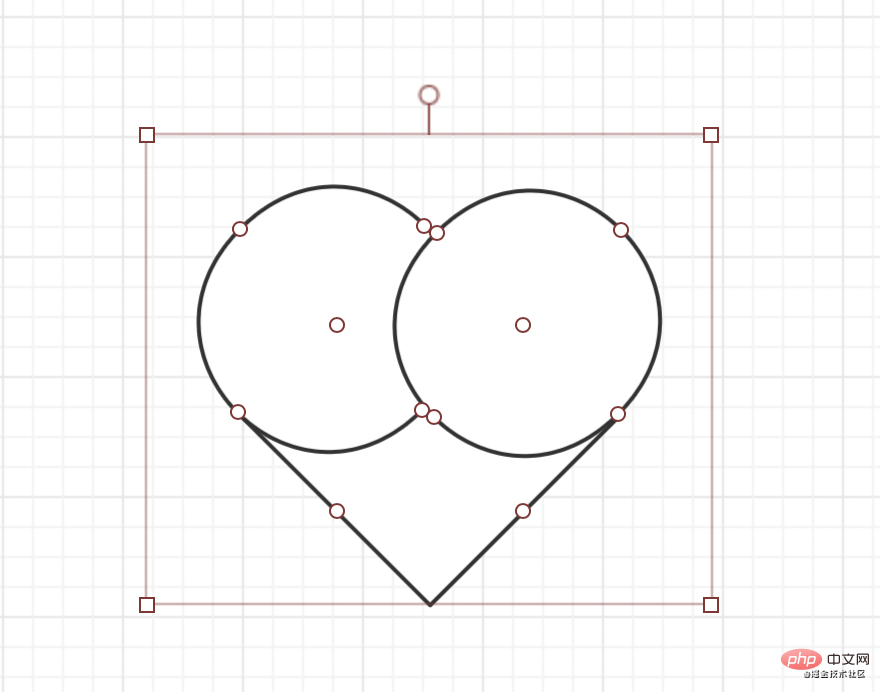
1、先画一个正方形:
<body>
    <div id="heart"></div>
</body>#heart{
height: 300px;
width: 300px;
border: 2px solid black;
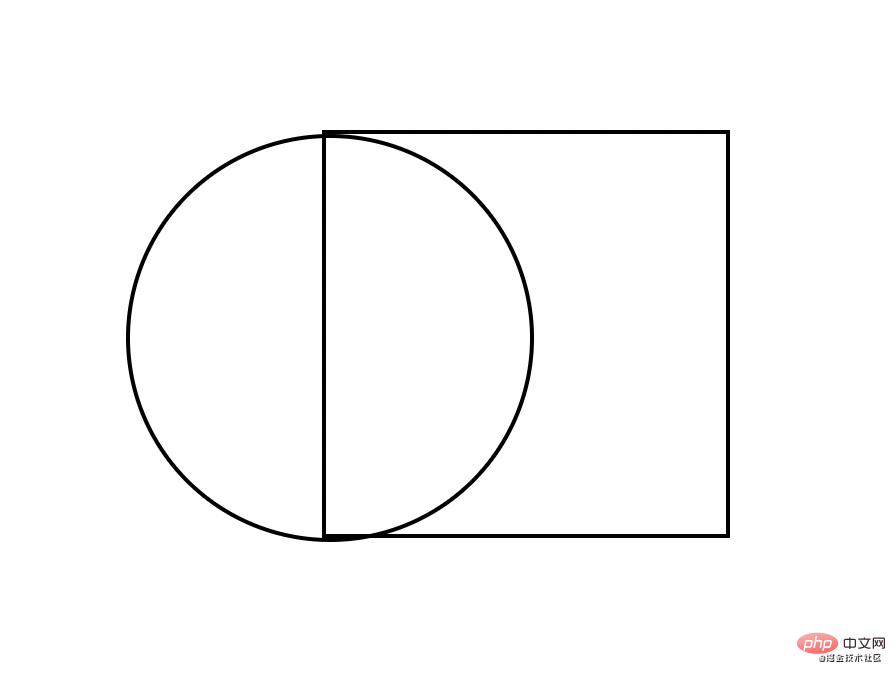
}2、给这个正方形的左边加行一个圆形.这里使用伪类:before来实现
     #heart{
            height: 200px;
            width: 200px;
            border: 2px solid black;
            position: relative;
        }
    #heart:before{
        content: '';
        width: 200px;
        height: 200px;
        border: 2px solid black;
        border-radius: 50%; // 正方形加圆角变成圆
        position: absolute;
        left: -100px;  // 向左位移正方形一半的长度
}此时图形长这样:
3、再添加一个圆形, 这里使用after伪类来实现.
    #heart{
            height: 200px;
            width: 200px;
            border: 2px solid black;
            position: relative;
        }
        // 这里偷个懒.直接写一块了
    #heart:before,#heart:after{
        content: '';
        width: 200px;
        height: 200px;
        border: 2px solid black;
        border-radius: 50%;
        position: absolute;
        left: -100px;
    }
    // 第二个圆, 只需要向上位移正方形一半的高度
    #heart:after{
        left: 0;
        top: -100px;
    }
4、最后一步, 旋转一下, 然后上个颜色.去掉之前为了看清楚加的边框.
    /*给heart进行旋转并加上颜色*/
  transform: rotate(45deg);
  background-color: red;

完整代码:
<style>
        body,html{
            display: flex;
            align-items: center;
            justify-content: center;
            height: 100vh;
        }
        #heart{
            height: 200px;
            width: 200px;
            /*border: 2px solid black;*/
            position: relative;
            transform: rotate(45deg);
            background-color: red;
        }
        #heart:before,#heart:after{
            content: '';
            width: 200px;
            height: 200px;
            /*border: 2px solid black;*/
            border-radius: 50%;
            position: absolute;
            left: -100px;
            background-color: red;
        }
        #heart:after{
            left: 0;
            top: -100px;
        }
    </style>
</head>
<body>
    <div id="heart"></div>
</body>爱心可以由一个正方形和两个圆形组成, 这里使用before和after伪类, 然后, 分别对两个伪类进行位移. 最后挤上颜色, 就可以实现一个爱心。
更多编程相关知识,请访问:编程视频!!
以上就是通过有趣生动的图片,了解怎么使用纯CSS绘制一个爱心!!的详细内容,更多请关注php中文网其它相关文章!

每个人都需要一台速度更快、更稳定的 PC。随着时间的推移,垃圾文件、旧注册表数据和不必要的后台进程会占用资源并降低性能。幸运的是,许多工具可以让 Windows 保持平稳运行。

Copyright 2014-2025 https://www.php.cn/ All Rights Reserved | php.cn | 湘ICP备2023035733号