package com.yan.otlan.springboot;
import org.springframework.boot.actuate.endpoint.annotation.Endpoint;
import org.springframework.boot.actuate.endpoint.annotation.ReadOperation;
import org.springframework.boot.actuate.endpoint.annotation.Selector;
import org.springframework.stereotype.Component;
@Endpoint(id = "customPoint")
@Component
public class StatusEndPoint {
	@ReadOperation
	public String getCustom(@Selector String name) {
		return "MyName is ." + name;
	}
}只需要三个注解 @endpoint、@ReadOperation、@Selector

看到红色mapped就说明可以成功了
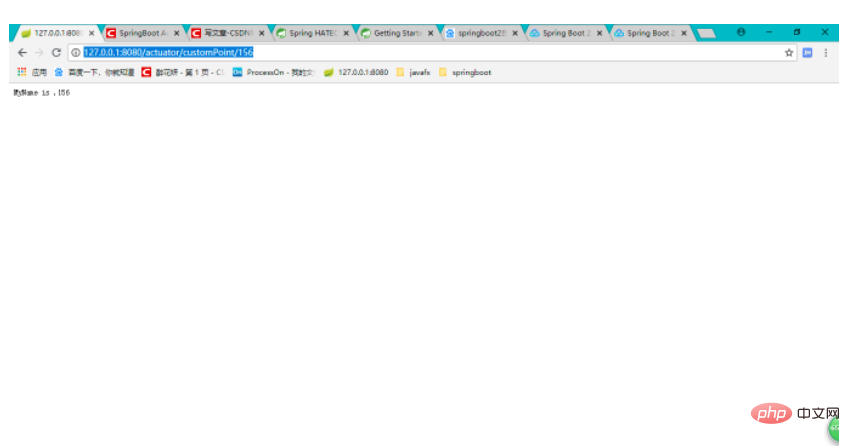
访问http://127.0.0.1:8080/actuator/customPoint/156
结果
management.endpoints.enabled-by-default: false
默认访问路径为/actuator,可通过修改以下属性进行修改
management.endpoints.web.base-path: /actuator
如默认访问路径为 http://ip:port/actuator
如想将访问路径修改为 http://ip:port/myActuator
可将属性设置为 /myActuator
路径必须以/开始,否则无法访问
以上就是SpringBoot2怎么自定义端点的详细内容,更多请关注php中文网其它相关文章!

每个人都需要一台速度更快、更稳定的 PC。随着时间的推移,垃圾文件、旧注册表数据和不必要的后台进程会占用资源并降低性能。幸运的是,许多工具可以让 Windows 保持平稳运行。

Copyright 2014-2025 https://www.php.cn/ All Rights Reserved | php.cn | 湘ICP备2023035733号


 488
488