创建一个maven项目
导入springboot依赖,注意底下注释部分
<?xml version="1.0" encoding="UTF-8"?>
<project xmlns="http://maven.apache.org/POM/4.0.0"
         xmlns:xsi="http://www.w3.org/2001/XMLSchema-instance"
         xsi:schemaLocation="http://maven.apache.org/POM/4.0.0 http://maven.apache.org/xsd/maven-4.0.0.xsd">
    <modelVersion>4.0.0</modelVersion>

    <groupId>com.znsd.springboot</groupId>
    <artifactId>springboot-jsp</artifactId>
    <version>1.0-SNAPSHOT</version>


    <!-- 一定要声明war包 -->
    <packaging>war</packaging>
    <parent>
        <groupId>org.springframework.boot</groupId>
        <artifactId>spring-boot-starter-parent</artifactId>
        <version>2.3.12.RELEASE</version>
        <relativePath/> <!-- lookup parent from repository -->
    </parent>

    <dependencies>
        <dependency>
            <groupId>org.springframework.boot</groupId>
            <artifactId>spring-boot-starter-web</artifactId>
        </dependency>

        <!-- 去除springboot默认tomcat依赖,让其在生成war包时无效, -->
        <dependency>
            <groupId>org.springframework.boot</groupId>
            <artifactId>spring-boot-starter-tomcat</artifactId>
            <!--在编译和测试有效,生成war包时无效-->
            <scope>provided</scope>
        </dependency>

        <dependency>
            <groupId>org.springframework.boot</groupId>
            <artifactId>spring-boot-starter-test</artifactId>
            <scope>test</scope>
            <exclusions>
                <exclusion>
                    <groupId>org.junit.vintage</groupId>
                    <artifactId>junit-vintage-engine</artifactId>
                </exclusion>
            </exclusions>
        </dependency>
    </dependencies>

    <build>
        <plugins>
            <plugin>
                <groupId>org.springframework.boot</groupId>
                <artifactId>spring-boot-maven-plugin</artifactId>
            </plugin>
        </plugins>
    </build>
</project>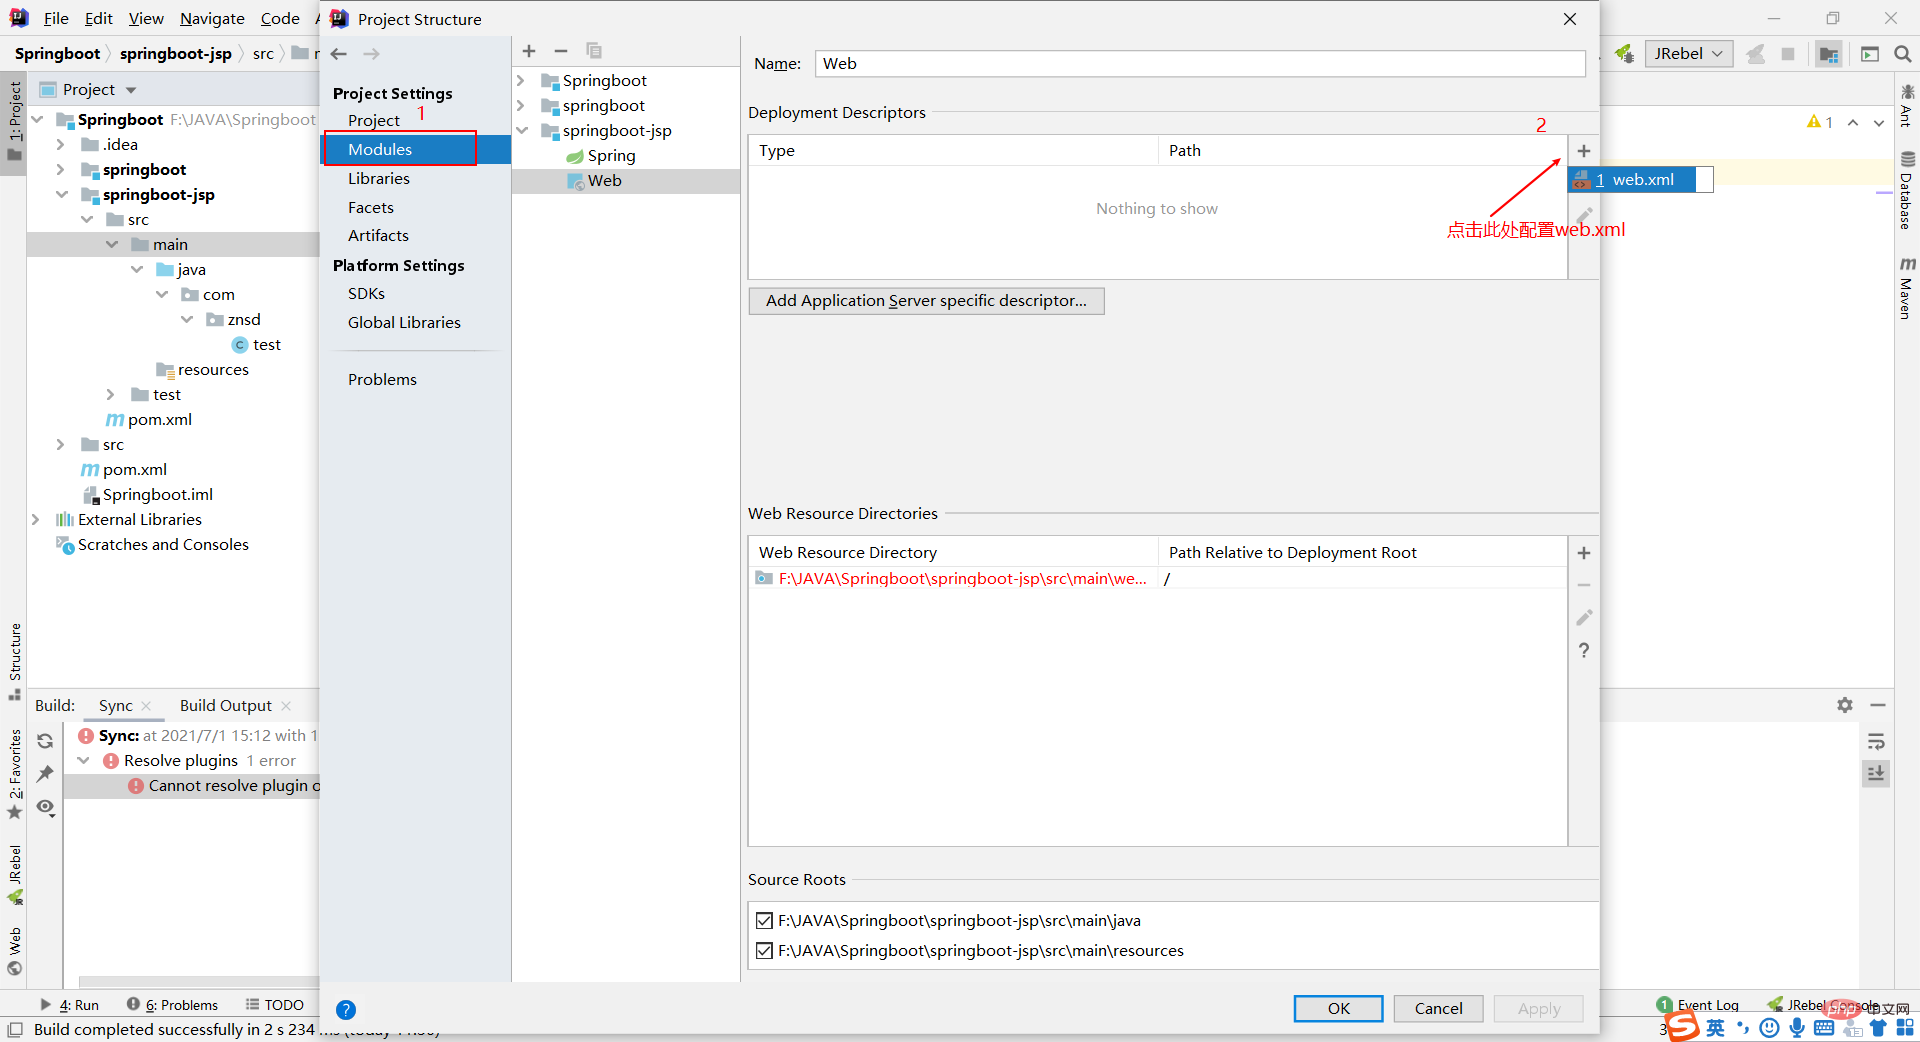
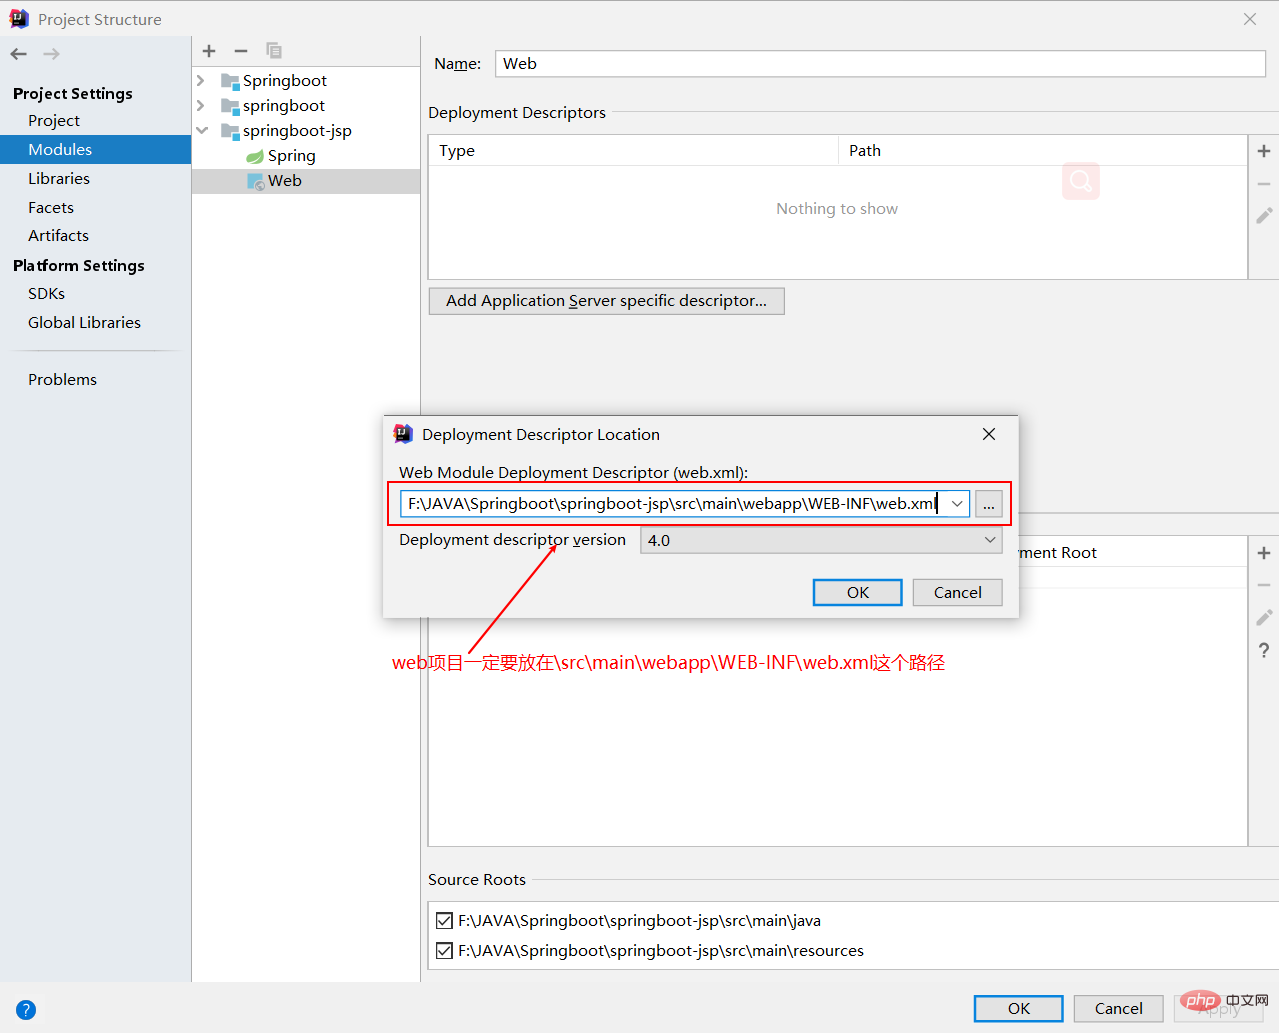
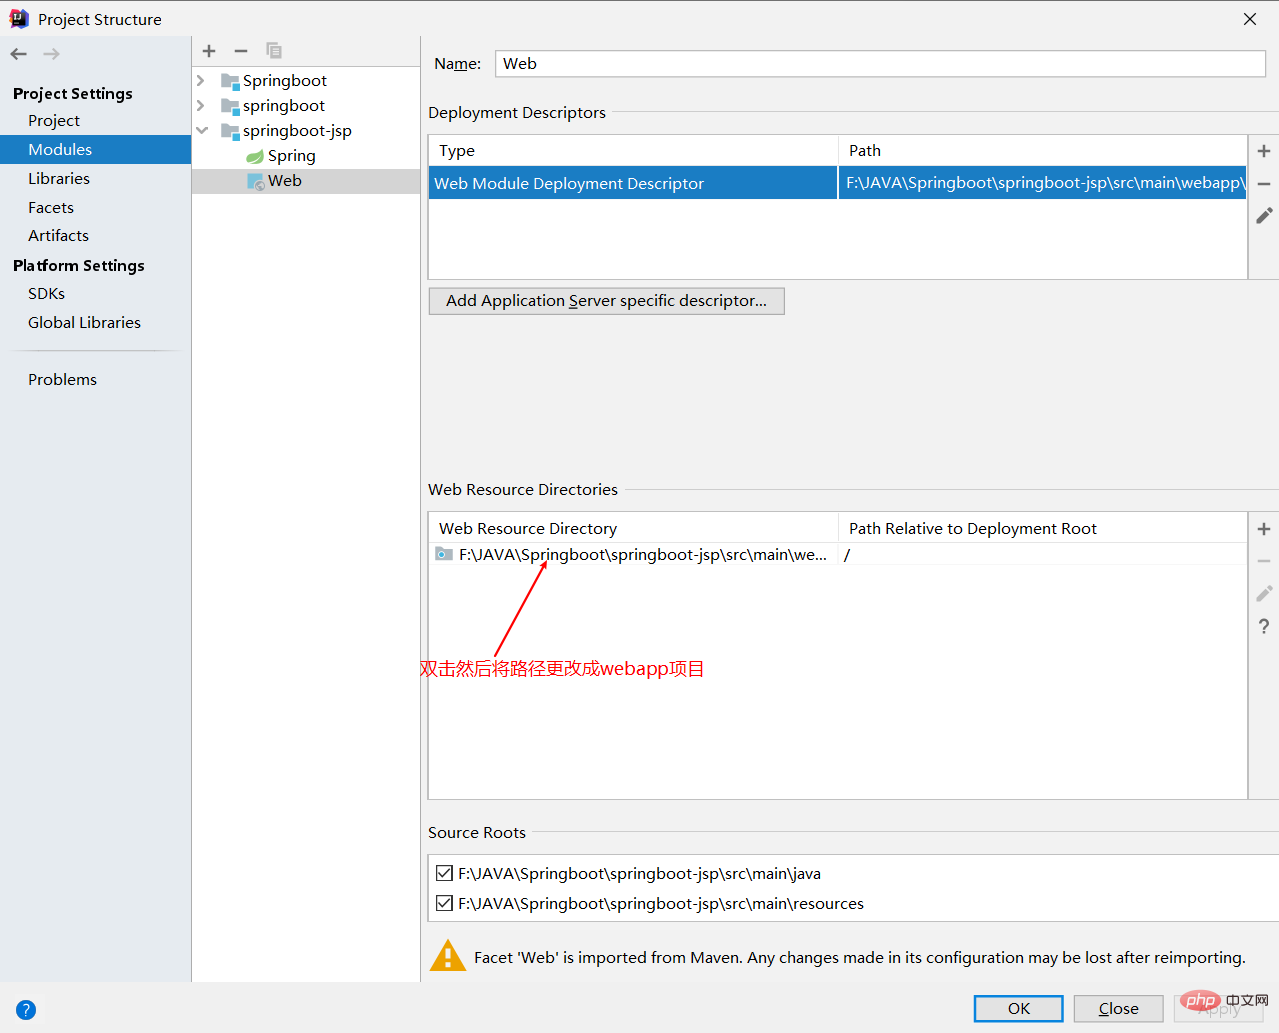
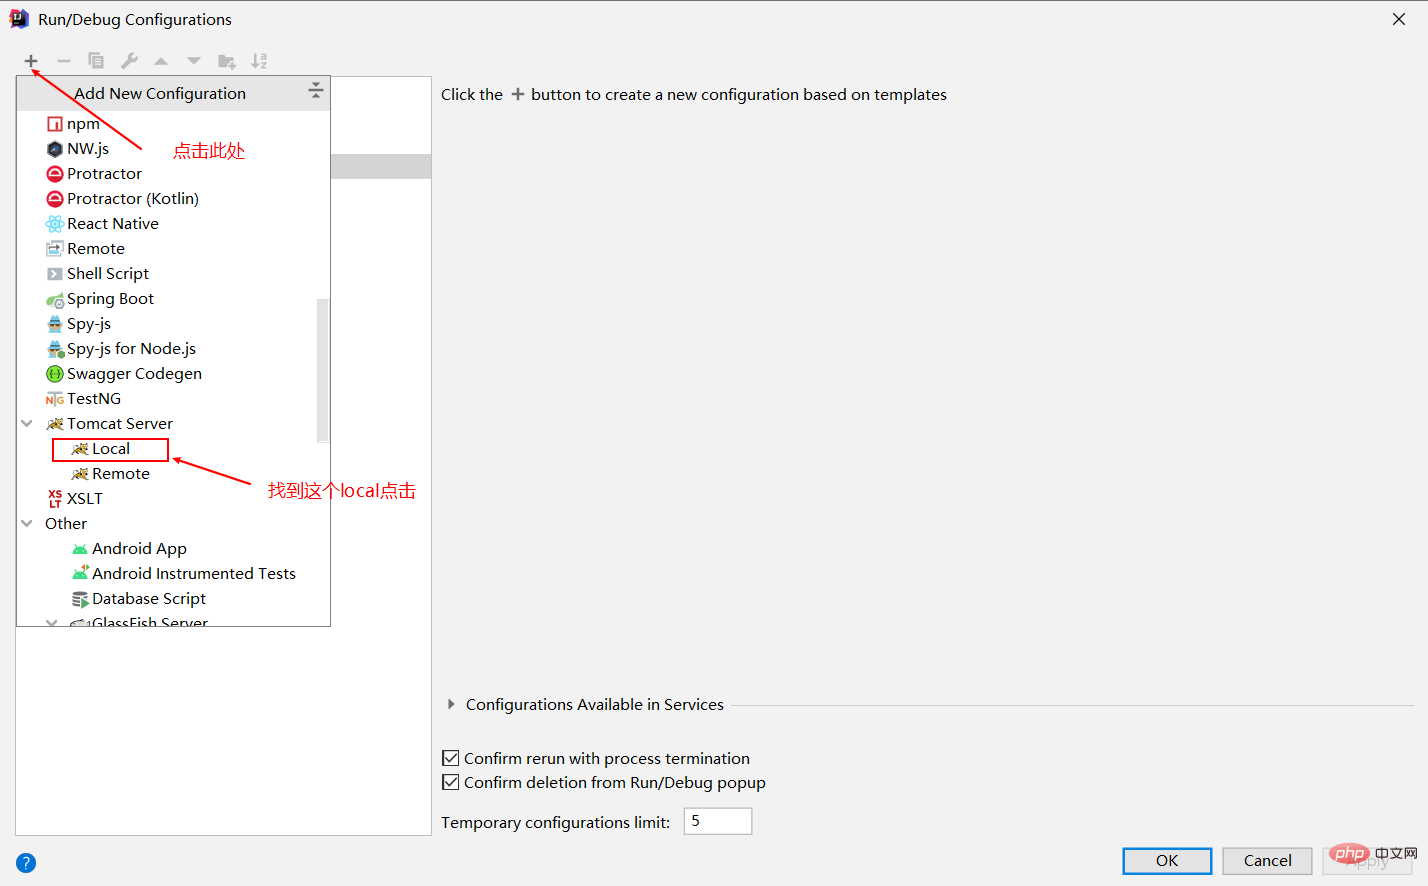
完成下图操作保存即可
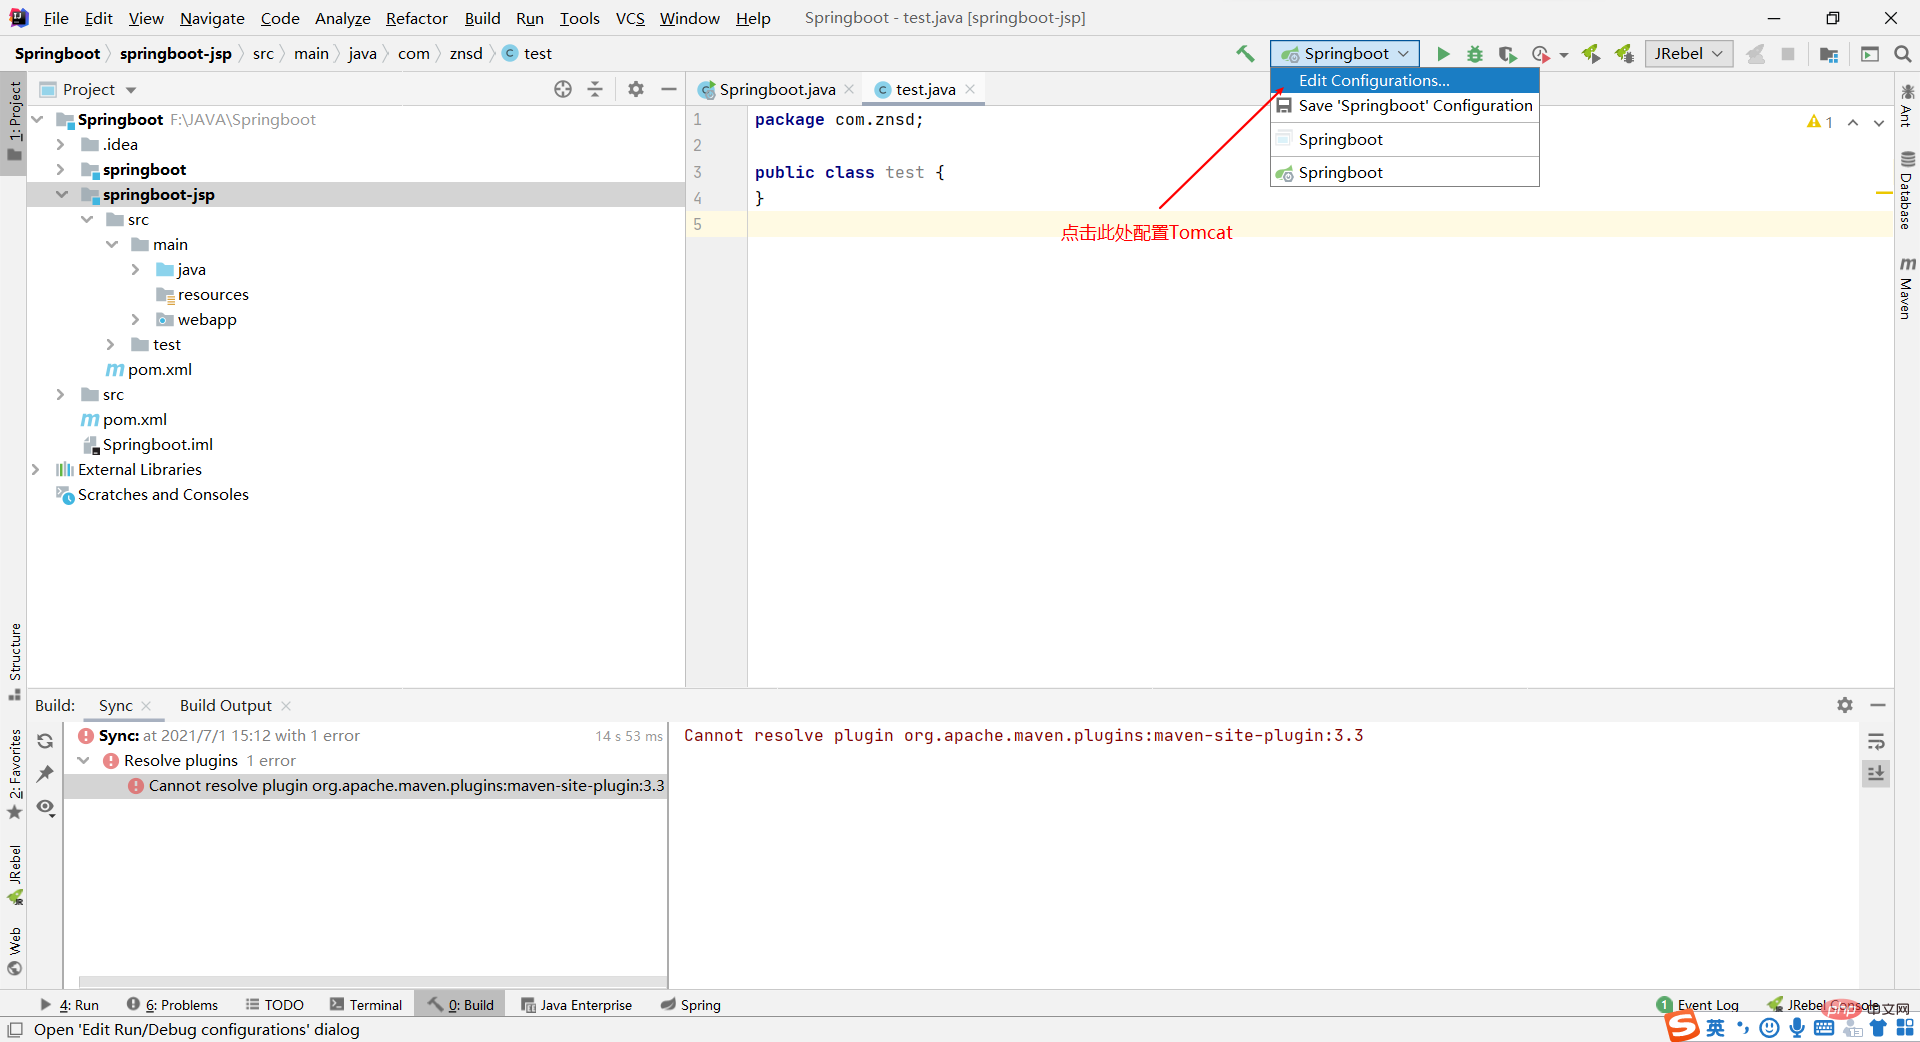
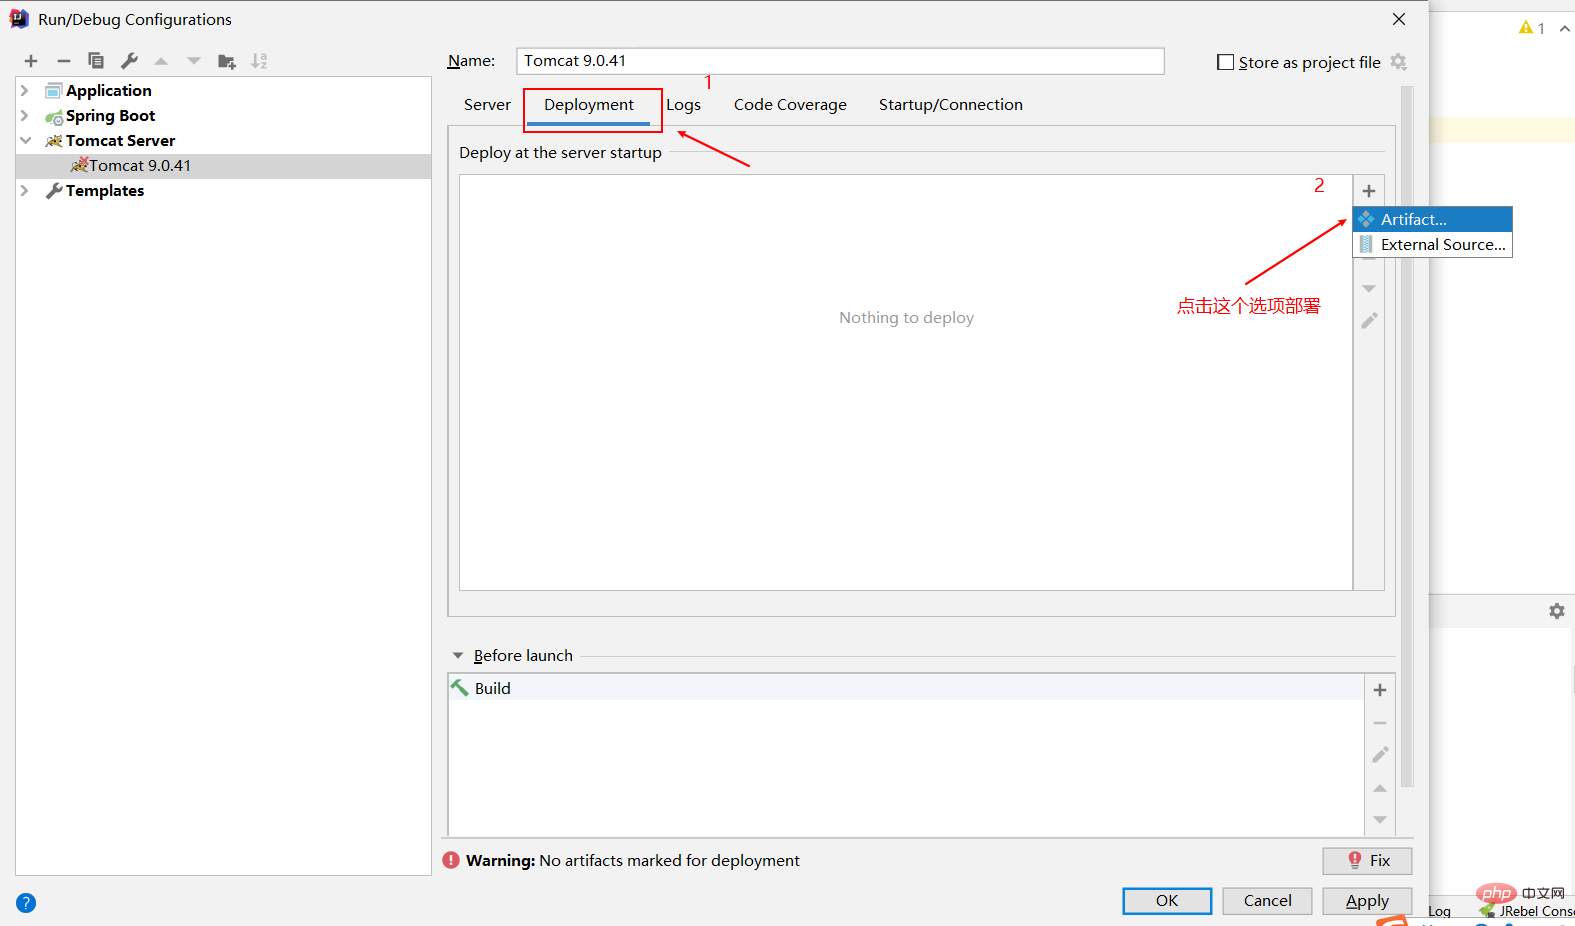
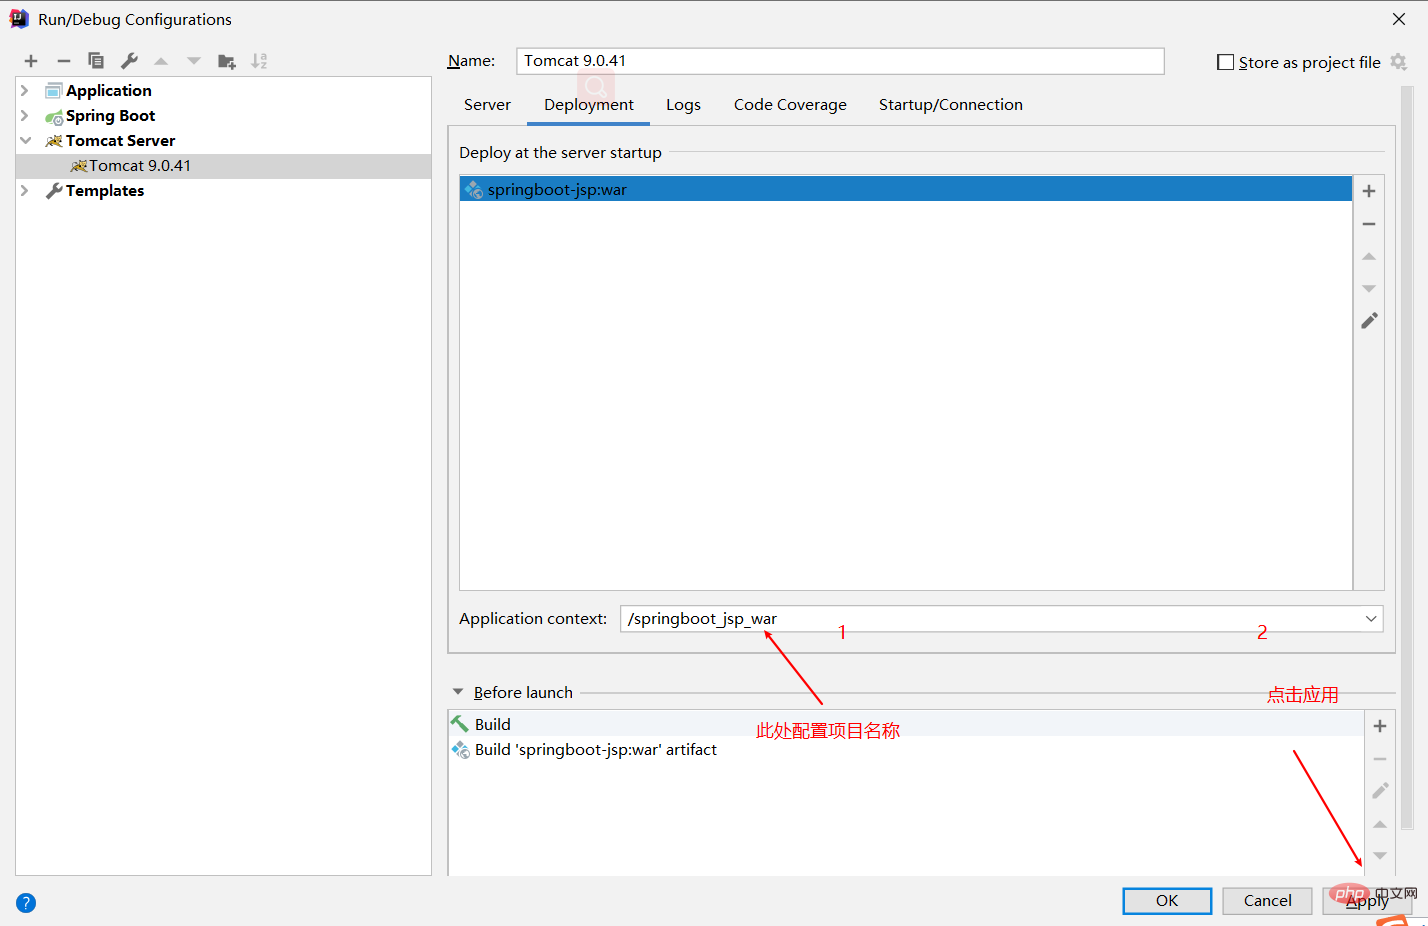
配置tomcat启动项
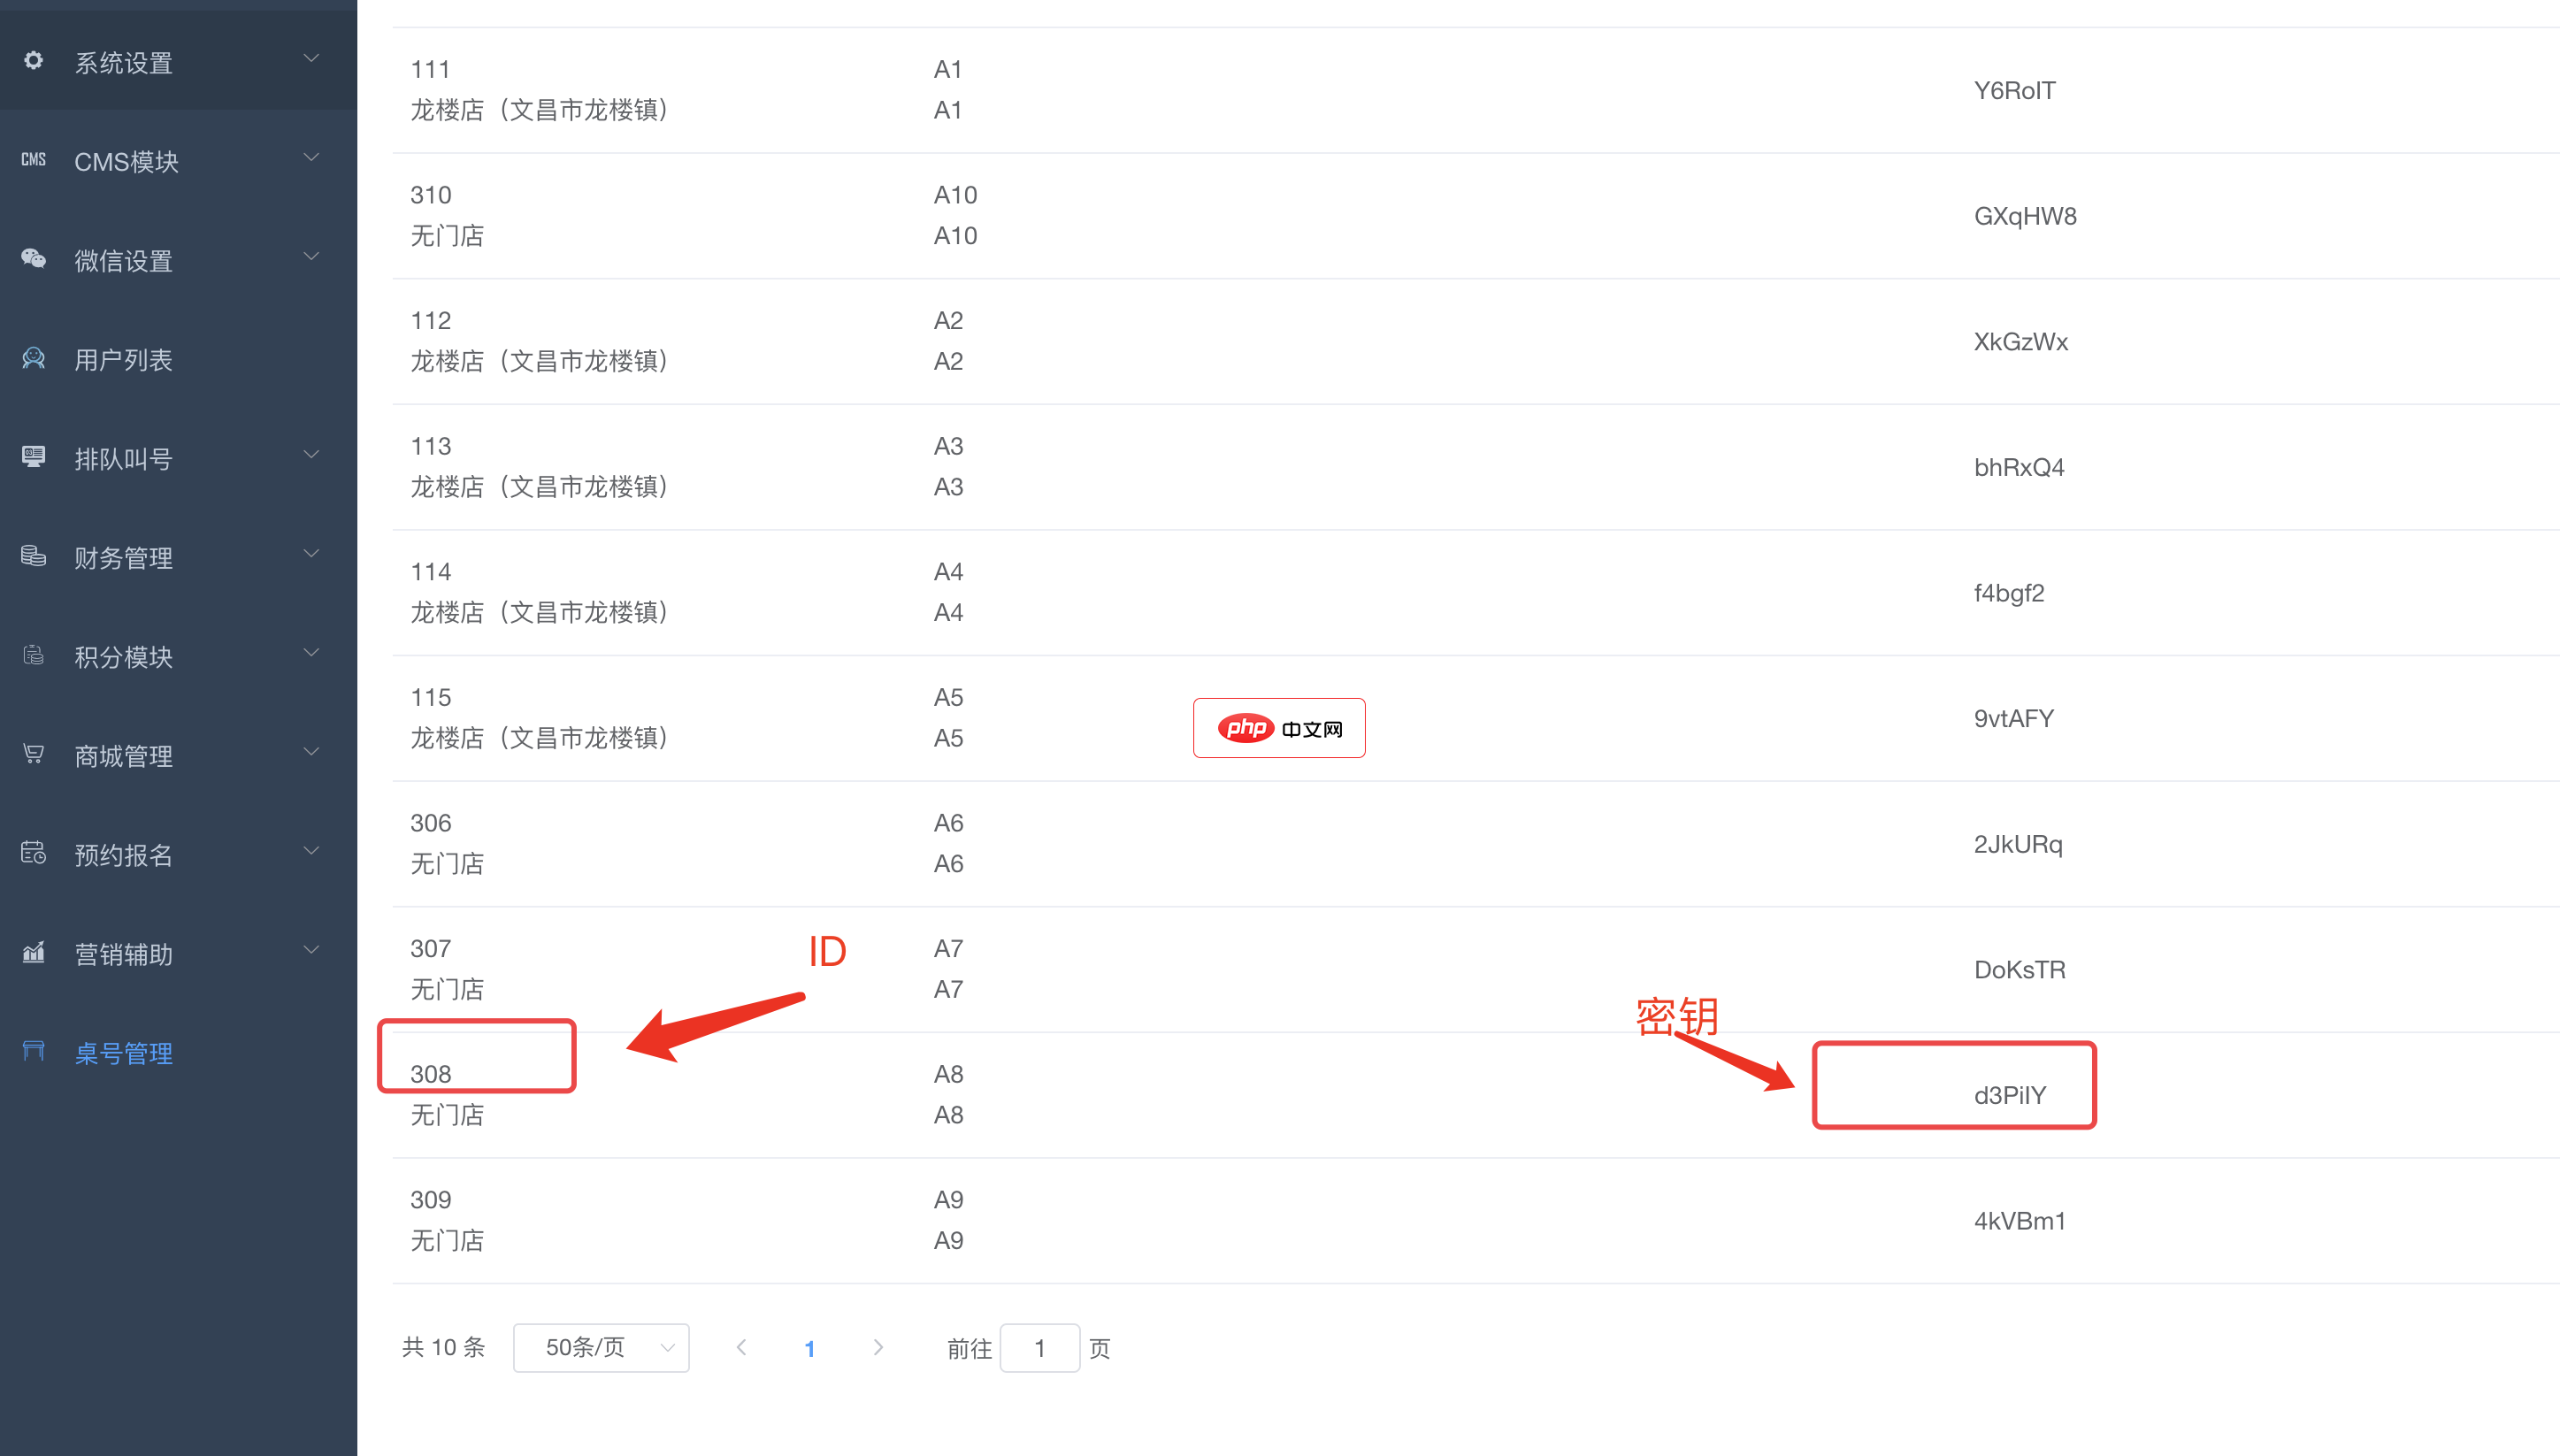
bee餐饮点餐外卖小程序是针对餐饮行业推出的一套完整的餐饮解决方案,实现了用户在线点餐下单、外卖、叫号排队、支付、配送等功能,完美的使餐饮行业更高效便捷!功能演示:1、桌号管理登录后台,左侧菜单 “桌号管理”,添加并管理你的桌号信息,添加以后在列表你将可以看到 ID 和 密钥,这两个数据用来生成桌子的二维码2、生成桌子二维码例如上面的ID为 308,密钥为 d3PiIY,那么现在去左侧菜单微信设置
 1
1

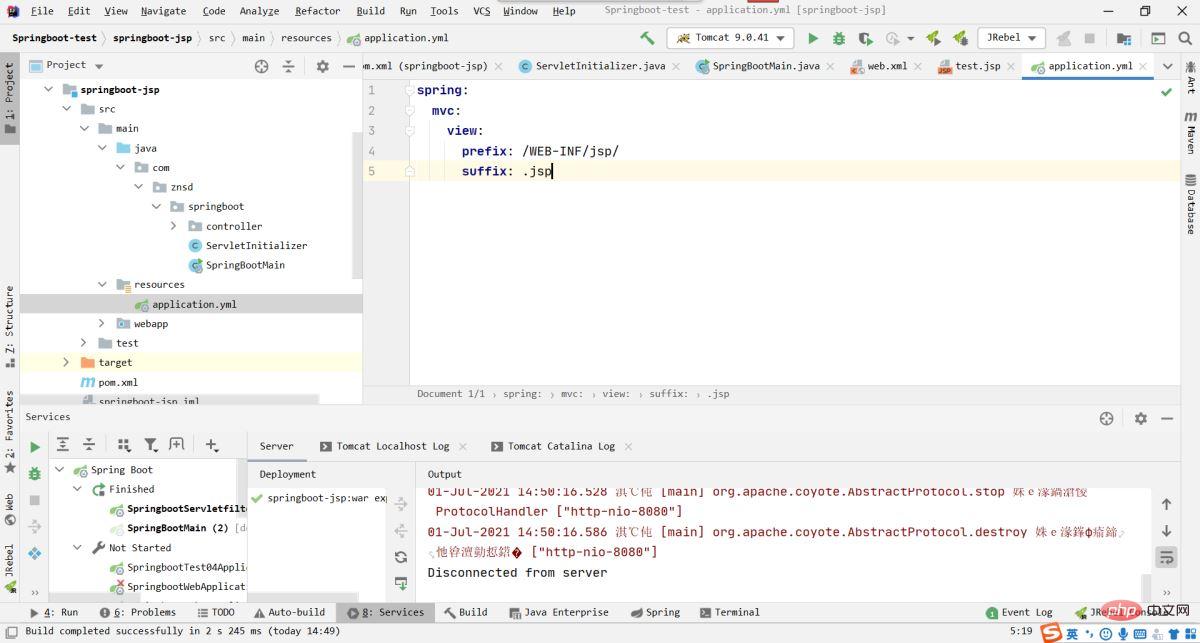
配置视图解析器
创建一个springboot主程序
@SpringBootApplication
public class SpringBootMain {
    public static void main(String[] args) {
        SpringApplication.run(SpringBootMain.class,args);
    }
}必须编写一个SpringBootServletInitializer的子类,并调用configure方法里面的固定写法
public class ServletInitializer extends SpringBootServletInitializer {
    @Override
    protected SpringApplicationBuilder configure(SpringApplicationBuilder application) {
        //传入SpringBoot的主程序,
        return application.sources(SpringBootMain.class);
    }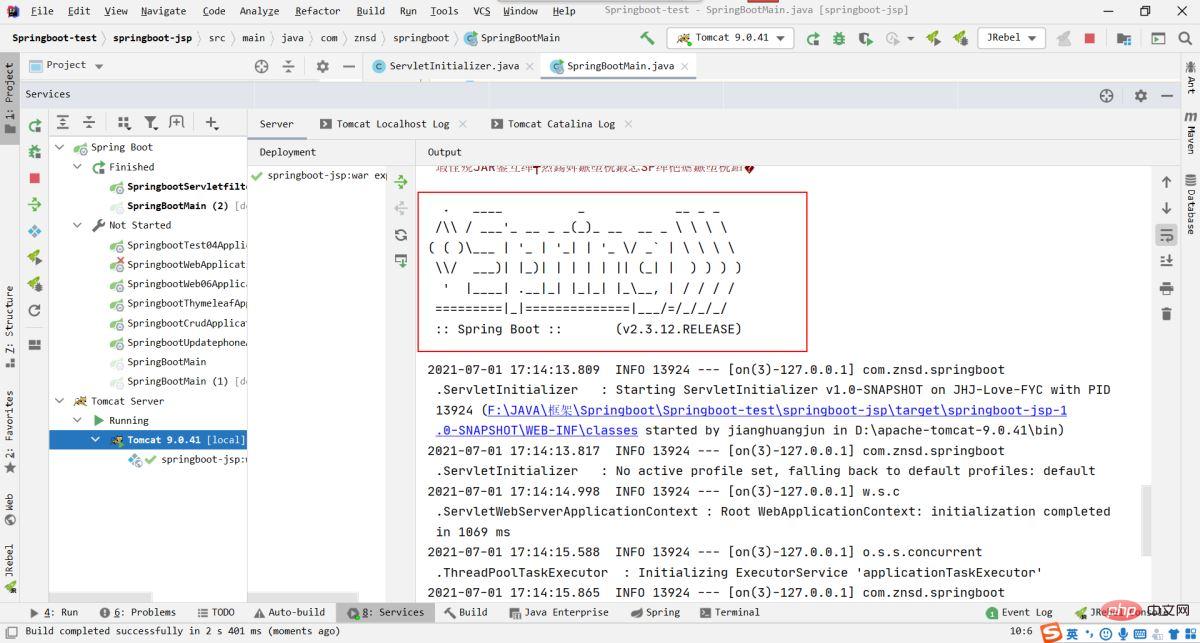
}然后启动tomcat,控制台输出了spring就启动成功了
以上就是idea怎么使用外置tomcat配置springboot的详细内容,更多请关注php中文网其它相关文章!

每个人都需要一台速度更快、更稳定的 PC。随着时间的推移,垃圾文件、旧注册表数据和不必要的后台进程会占用资源并降低性能。幸运的是,许多工具可以让 Windows 保持平稳运行。

Copyright 2014-2025 https://www.php.cn/ All Rights Reserved | php.cn | 湘ICP备2023035733号


 633
633