
点开@springboottest源码中查看
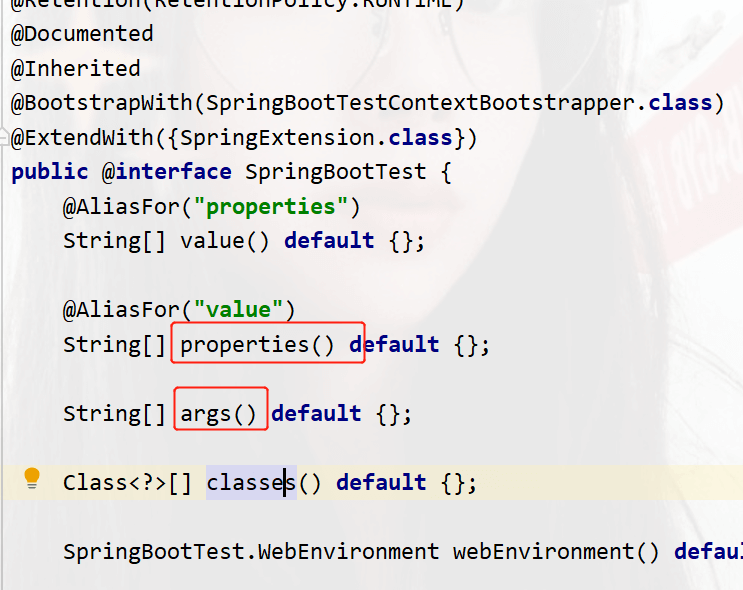
可以在之后加入临时配置, 也可以使用命令行args参数设置。设置的测试专用参数会覆盖配置文件中的。
package com;
import org.junit.jupiter.api.Test;
import org.springframework.beans.factory.annotation.Value;
import org.springframework.boot.test.context.SpringBootTest;
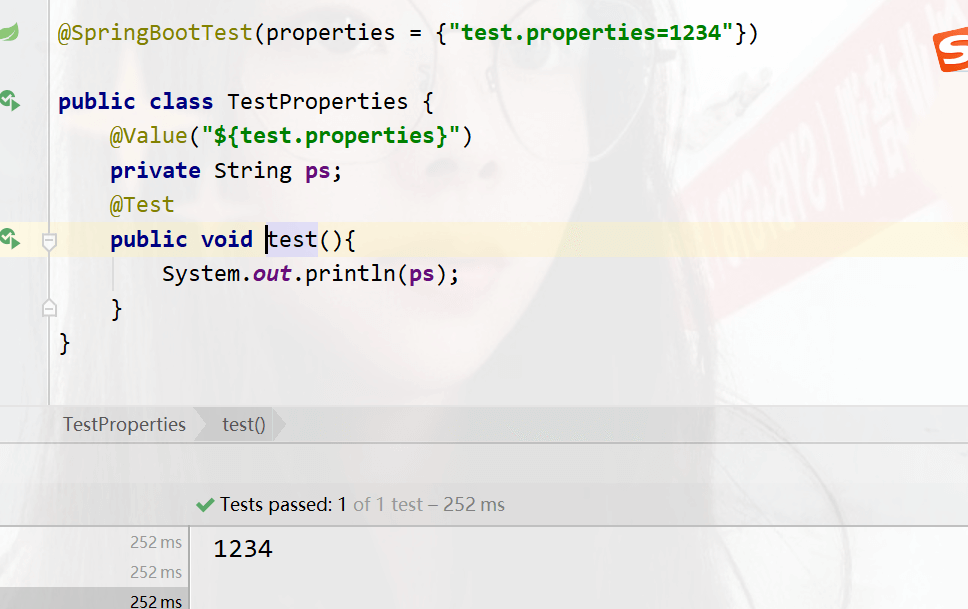
@SpringBootTest(args = {properties = {"test.properties=1234"})
public class TestProperties {
@Value("${test.properties}")
private String ps;
@Test
public void test(){
System.out.println(ps);
}
}
也可以使用命令行参数
args = {"--test.properties=4321"},
命令行参数的优先级比配置文件的高,所以当两者共存的时候,以命令行的为主
@SpringBootTest(args = {"--test.properties=4321"},properties = {"test.properties=1234"})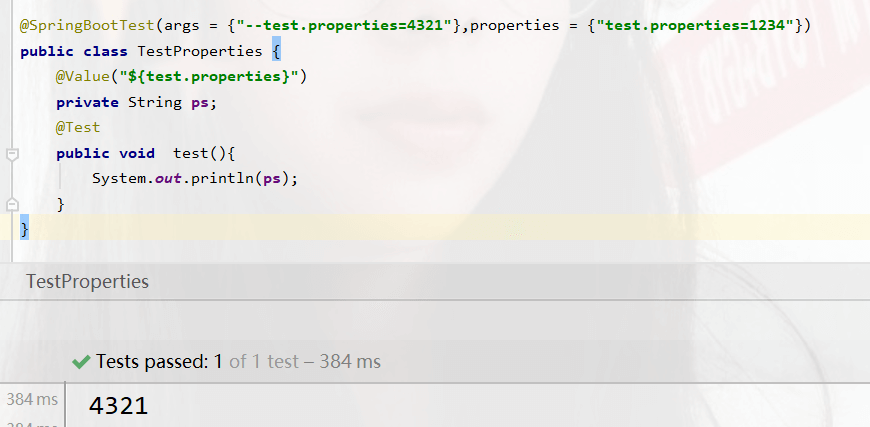
这个测试类设置的属性只对当前测试有效,影响小
package com.config;
import org.springframework.context.annotation.Bean;
import org.springframework.context.annotation.Configuration;
@Configuration//说明当前为配置类
public class TestBean {
    @Bean//创建bean
    public String mess(){
        return "this bean run ";
    }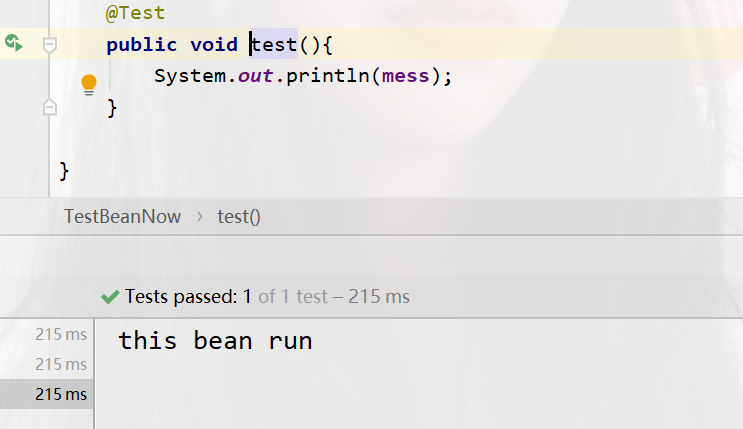
}在测试类下,使用@Import注解加载当前测试配置
package com.test;
import com.config.TestBean;
import org.junit.jupiter.api.Test;
import org.springframework.beans.factory.annotation.Autowired;
import org.springframework.boot.test.context.SpringBootTest;
import org.springframework.context.annotation.Import;
@SpringBootTest
@Import({TestBean.class})
public class TestBeanNow {
    @Autowired//注入bean对象
    public String mess;
    @Test
    public void test(){
        System.out.println(mess);
    }
}
在测试类中运行一般是不会启动服务器的,如下图。都是显示运行成功或失败的信息

我们Ctrl+b点进@SpringBootTest源码中查看,有一个关于web的
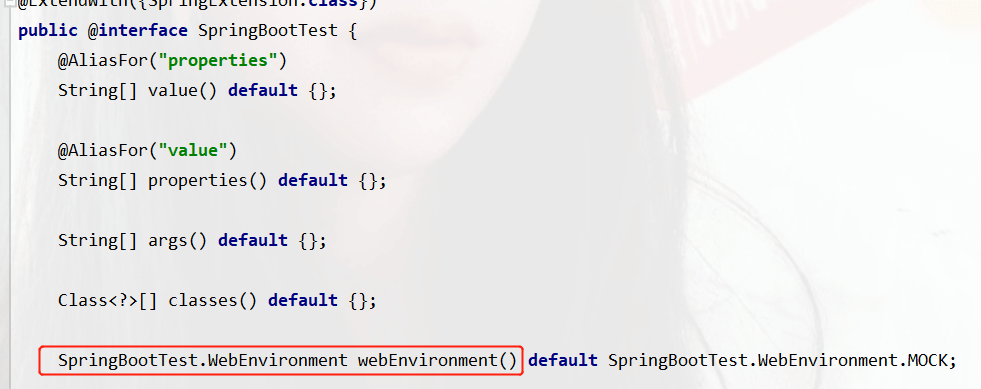
默认值是MOCK,mock:默认提供一个模拟的web环境,不会启动内嵌的服务器

第一个是以你配置文件指定的端口启动,如果没有就默认以8080启动
第二个mock:默认提供一个模拟的web环境,不会启动内嵌的服务器
第三个是不启动服务器
第四个是随机端口启动
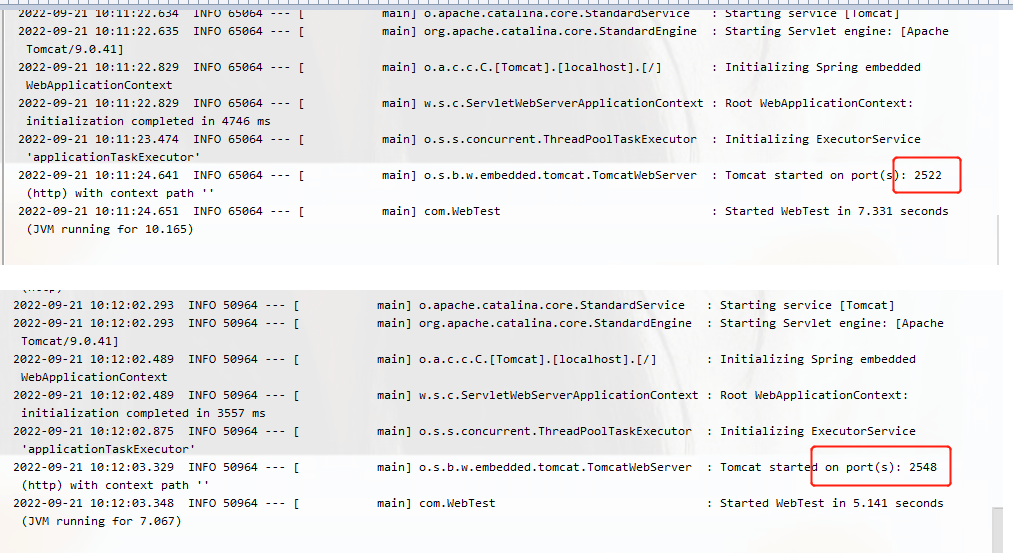
我们测试随机端口启动
package com;
import org.junit.jupiter.api.Test;
import org.springframework.boot.test.context.SpringBootTest;
@SpringBootTest(webEnvironment = SpringBootTest.WebEnvironment.RANDOM_PORT)
public class WebTest {
    @Test
    public void test(){
    }
}运行了两次看端口结果,都是随机的
以上就是SpringBoot如何测试配置属性与web启动环境的详细内容,更多请关注php中文网其它相关文章!

每个人都需要一台速度更快、更稳定的 PC。随着时间的推移,垃圾文件、旧注册表数据和不必要的后台进程会占用资源并降低性能。幸运的是,许多工具可以让 Windows 保持平稳运行。

 广告
广告


Copyright 2014-2025 https://www.php.cn/ All Rights Reserved | php.cn | 湘ICP备2023035733号


 620
620


