文件分片上传通过将大文件切分为小块提升上传效率与稳定性。其核心实现步骤如下:1.前端使用filereader和slice()方法进行文件切割;2.利用fetch或xmlhttprequest逐个上传分片,并附带分片索引等元数据;3.通过localstorage记录已上传分片实现断点续传,后端需存储并验证分片状态;4.服务器接收所有分片后按序合并成完整文件;5.合理选择4mb-8mb的分片大小以平衡请求次数与失败率;6.上传失败时采用重试机制,设置最大重试次数与延迟间隔;7.监听上传进度事件实现ui实时反馈,从而优化用户体验。

文件分片上传,简单来说,就是把一个大文件切成很多小块,一块一块地传到服务器。这样做的好处显而易见:提升上传速度,降低单次上传失败的风险,还能实现断点续传。

js实现文件分片上传与断点续传,核心在于前端的文件切割、上传控制,以及后端的分片合并。

前端文件切割: 使用FileReader API读取文件,然后用slice()方法将文件切割成指定大小的块。

async function sliceFile(file, chunkSize) {
    const chunks = [];
    let offset = 0;
    while (offset < file.size) {
        const chunk = file.slice(offset, offset + chunkSize);
        chunks.push(chunk);
        offset += chunkSize;
    }
    return chunks;
}上传分片: 使用XMLHttpRequest或fetch API将每个分片上传到服务器。 每个分片都作为一个独立的请求发送。
async function uploadChunk(chunk, fileId, chunkIndex, totalChunks) {
    const formData = new FormData();
    formData.append('file', chunk);
    formData.append('fileId', fileId);
    formData.append('chunkIndex', chunkIndex);
    formData.append('totalChunks', totalChunks);

    try {
        const response = await fetch('/upload', {
            method: 'POST',
            body: formData,
        });

        if (!response.ok) {
            throw new Error(`HTTP error! status: ${response.status}`);
        }

        const data = await response.json();
        return data; // 假设后端返回上传结果
    } catch (error) {
        console.error('上传分片失败:', error);
        throw error; // 向上抛出错误,便于后续处理
    }
}断点续传: 在上传过程中,记录已上传的分片信息。如果上传中断,下次可以从上次中断的位置继续上传。这需要后端配合,记录已上传的分片。前端也需要存储这些信息,例如使用localStorage。

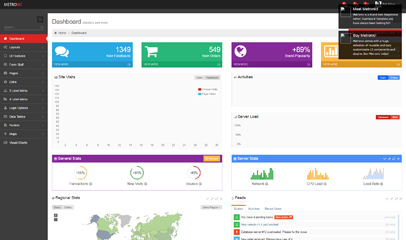
Metronic是一套精美的响应式后台管理模板,基于强大的Twitter Bootstrap框架实现。Metronic拥有简洁优雅的Metro UI风格界面,自适应屏幕分辨率大小,兼容PC端和手机移动端。全套模板,包含仪表盘、侧边栏菜单、布局宣传片、电子邮件模板、UI特性、按钮、标签、表格布局、表单组件、多文件上传、悬浮窗文件上传、时间表、博客、新闻、关于我们、联系我们、日历、用户配置文件、锁屏、
 275
275

// 示例:使用localStorage存储已上传的分片
function saveUploadedChunk(fileId, chunkIndex) {
    let uploadedChunks = JSON.parse(localStorage.getItem(fileId) || '[]');
    uploadedChunks.push(chunkIndex);
    localStorage.setItem(fileId, JSON.stringify(uploadedChunks));
}

function getUploadedChunks(fileId) {
    return JSON.parse(localStorage.getItem(fileId) || '[]');
}后端分片合并: 服务器接收到所有分片后,按照分片顺序将它们合并成完整的文件。
分片大小的选择直接影响上传效率和用户体验。 太小的分片会导致过多的请求,增加服务器压力;太大的分片则可能因为网络不稳定导致单次上传失败。一般来说,4MB-8MB是一个比较合适的范围。 实际应用中,可以根据网络环境和文件大小进行调整。
上传过程中,网络波动、服务器故障等都可能导致上传失败。为了提高上传成功率,需要实现错误处理和重试机制。可以设置最大重试次数,每次重试之间增加一定的延迟。 超过最大重试次数后,可以提示用户稍后重试。
async function retryUpload(chunk, fileId, chunkIndex, totalChunks, maxRetries = 3, delay = 1000) {
    let retries = 0;
    while (retries < maxRetries) {
        try {
            return await uploadChunk(chunk, fileId, chunkIndex, totalChunks);
        } catch (error) {
            console.warn(`分片 ${chunkIndex} 上传失败,正在重试 (${retries + 1}/${maxRetries})...`);
            retries++;
            await new Promise(resolve => setTimeout(resolve, delay)); // 延迟一段时间后重试
        }
    }
    throw new Error(`分片 ${chunkIndex} 上传达到最大重试次数,上传失败。`);
}实时展示上传进度可以显著提升用户体验。 可以通过监听XMLHttpRequest的progress事件,或者fetch API返回的ReadableStream来获取上传进度。 将进度信息更新到UI界面上,让用户了解上传状态。
// 使用 fetch API 监听上传进度
async function uploadWithProgress(chunk, fileId, chunkIndex, totalChunks, progressCallback) {
    const formData = new FormData();
    formData.append('file', chunk);
    formData.append('fileId', fileId);
    formData.append('chunkIndex', chunkIndex);
    formData.append('totalChunks', totalChunks);

    const response = await fetch('/upload', {
        method: 'POST',
        body: formData,
        duplex: 'half', // 允许读取请求体
        signal: AbortSignal.timeout(60000) // 设置超时时间
    });

    if (!response.body) {
        throw new Error('Response body is empty.');
    }

    const reader = response.body.getReader();
    const contentLength = response.headers.get('Content-Length');
    let receivedLength = 0;

    while (true) {
        const { done, value } = await reader.read();

        if (done) {
            break;
        }

        receivedLength += value.length;
        const progress = contentLength ? receivedLength / Number(contentLength) : 0;
        progressCallback(progress); // 调用回调函数更新进度
    }

    if (!response.ok) {
        throw new Error(`HTTP error! status: ${response.status}`);
    }

    const data = await response.json();
    return data;
}以上就是js怎样实现文件分片上传 大文件分片上传与断点续传实战的详细内容,更多请关注php中文网其它相关文章!

每个人都需要一台速度更快、更稳定的 PC。随着时间的推移,垃圾文件、旧注册表数据和不必要的后台进程会占用资源并降低性能。幸运的是,许多工具可以让 Windows 保持平稳运行。

Copyright 2014-2025 https://www.php.cn/ All Rights Reserved | php.cn | 湘ICP备2023035733号