本节引言
在上一节中我们对LinearLayout进行了详细的解析,LinearLayout也是我们
用的比较多的一个布局,我们更多的时候更钟情于他的weight(权重)属性,等比例划分,对屏幕适配还是
帮助蛮大的;但是使用LinearLayout的时候也有一个问题,就是当界面比较复杂的时候,需要嵌套多层的
LinearLayout,这样就会降低UI Render的效率(渲染速度),而且如果是listview或者GridView上的
item,效率会更低,另外太多层LinearLayout嵌套会占用更多的系统资源,还有可能引发stackoverflow;
但是如果我们使用RelativeLayout的话,可能仅仅需要一层就可以完成了,以父容器或者兄弟组件参考+margin
+padding就可以设置组件的显示位置,是比较方便的!当然,也不是绝对的,具体问题具体分析吧!
总结就是:尽量使用RelativeLayout + LinearLayout的weight属性搭配使用吧!
核心属性图
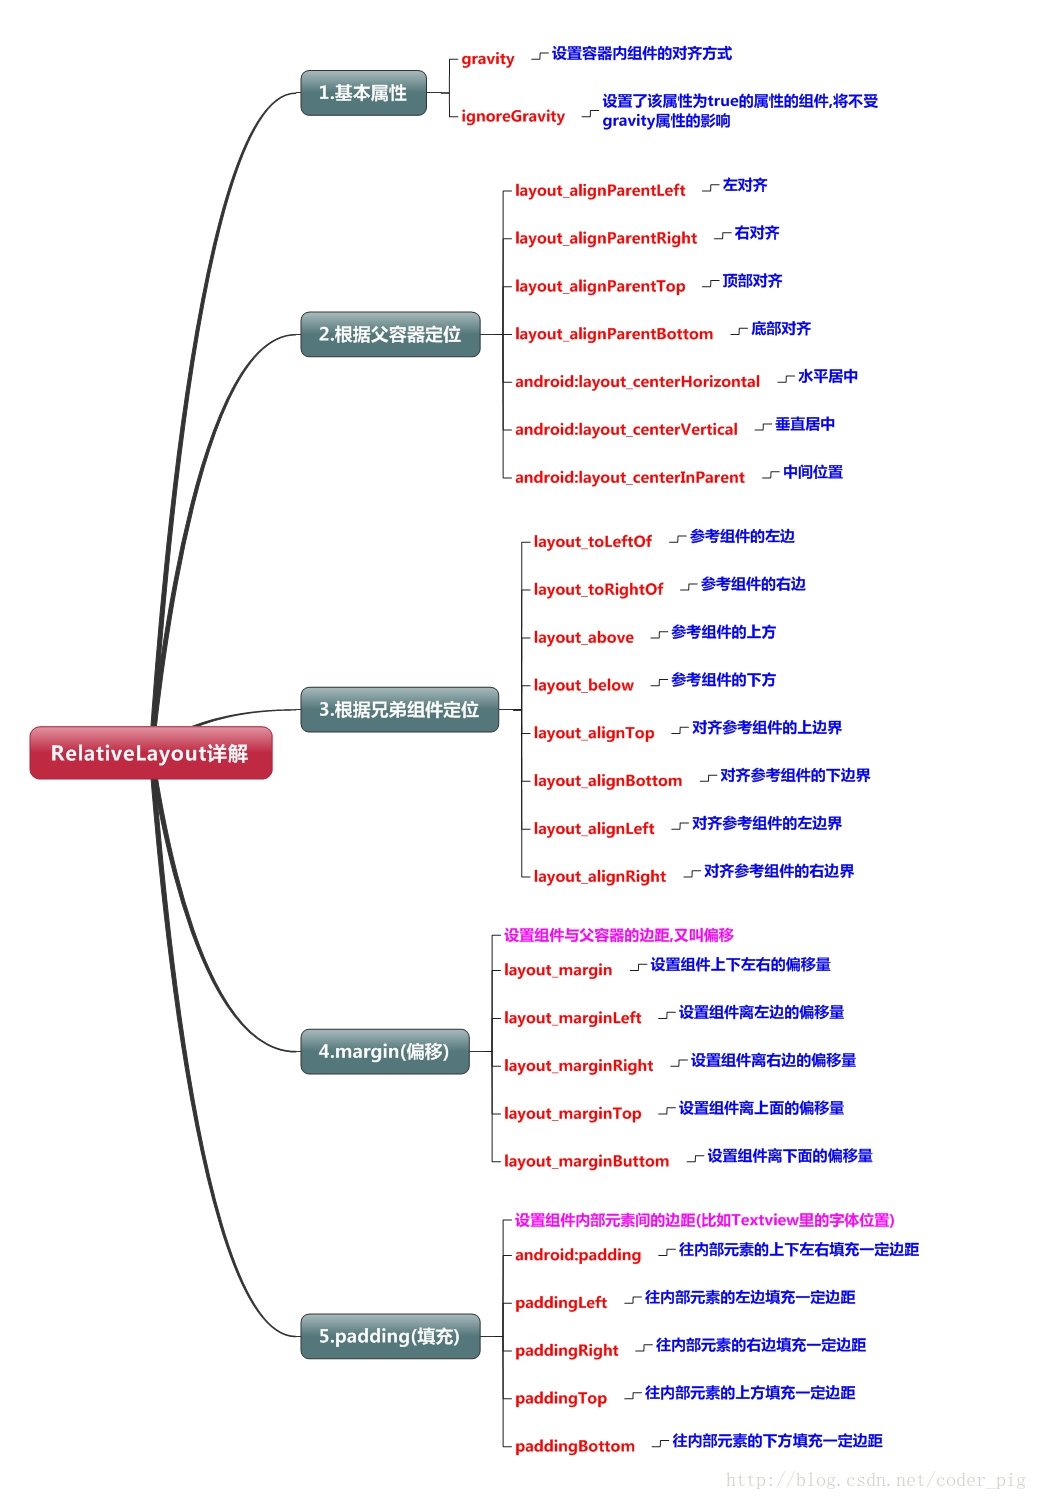
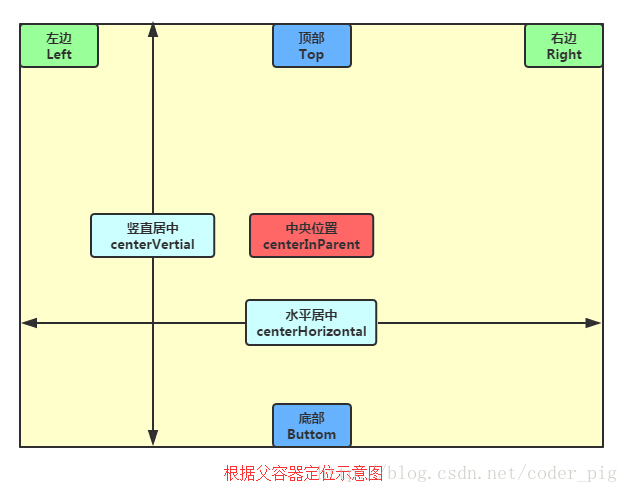
2.父容器定位属性示意图
3.根据兄弟组件定位
恩,先说下什么是兄弟组件吧,所谓的兄弟组件就是处于同一层次容器的组件,如图
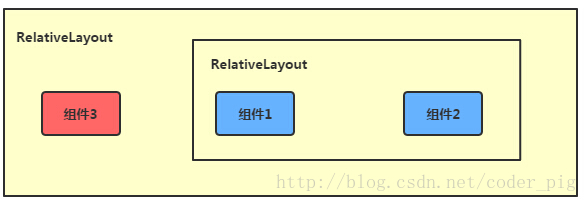
图中的组件1,2就是兄弟组件了,而组件3与组件1或组件2并不是兄弟组件,所以组件3不能通过
组件1或2来进行定位,比如layout_toleftof = "组件1"这样是会报错的!切记!
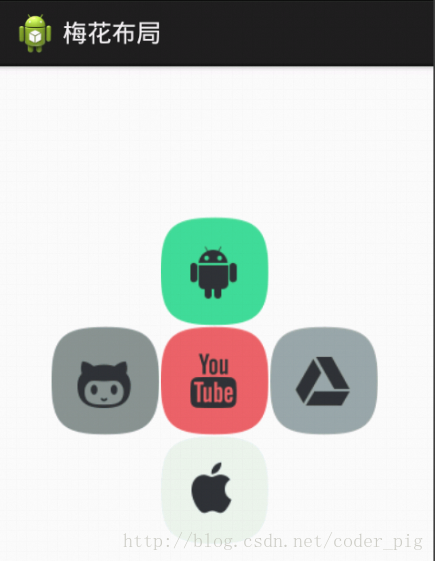
关于这个兄弟组件定位的最经典例子就是"梅花布局"了,下面代码实现下:
运行效果图:
实现代码:
xmlns:tools="http://schemas.android.com/tools"
android:id="@+id/RelativeLayout1"
android:layout_width="match_parent"
android:layout_height="match_parent" >
android:id="@+id/img1"
android:layout_width="80dp"
android:layout_height="80dp"
android:layout_centerInParent="true"
android:src="@drawable/pic1"/>
android:id="@+id/img2"
android:layout_width="80dp"
android:layout_height="80dp"
android:layout_toLeftOf="@id/img1"
android:layout_centerVertical="true"
android:src="@drawable/pic2"/>
android:id="@+id/img3"
android:layout_width="80dp"
android:layout_height="80dp"
android:layout_toRightOf="@id/img1"
android:layout_centerVertical="true"
android:src="@drawable/pic3"/>
android:id="@+id/img4"
android:layout_width="80dp"
android:layout_height="80dp"
android:layout_above="@id/img1"
android:layout_centerHorizontal="true"
android:src="@drawable/pic4"/>
android:id="@+id/img5"
android:layout_width="80dp"
android:layout_height="80dp"
android:layout_below="@id/img1"
android:layout_centerHorizontal="true"
android:src="@drawable/pic5"/>
4.margin与padding的区别
初学者对于这两个属性可能会有一点混淆,这里区分下:
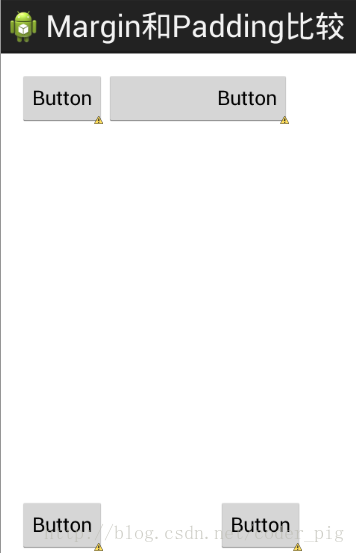
首先margin代表的是偏移,比如marginleft = "5dp"表示组件离容器左边缘偏移5dp;
而padding代表的则是填充,而填充的对象针对的是组件中的元素,比如TextView中的文字
比如为TextView设置paddingleft = "5dp",则是在组件里的元素的左边填充5dp的空间!
margin针对的是容器中的组件,而padding针对的是组件中的元素,要区分开来!
下面通过简单的代码演示两者的区别:
比较示例代码如下:
xmlns:tools="http://schemas.android.com/tools"
android:layout_width="match_parent"
android:layout_height="match_parent"
android:paddingBottom="@dimen/activity_vertical_margin"
android:paddingLeft="@dimen/activity_horizontal_margin"
android:paddingRight="@dimen/activity_horizontal_margin"
android:paddingTop="@dimen/activity_vertical_margin"
tools:context=".MainActivity" >
android:id="@+id/btn1"
android:layout_height="wrap_content"
android:layout_width="wrap_content"
android:text="Button"/>
android:paddingLeft="100dp"
android:layout_height="wrap_content"
android:layout_width="wrap_content"
android:text="Button"
android:layout_toRightOf="@id/btn1"/>
android:id="@+id/btn2"
android:layout_height="wrap_content"
android:layout_width="wrap_content"
android:text="Button"
android:layout_alignParentBottom="true"/>
android:layout_marginLeft="100dp"
android:layout_height="wrap_content"
android:layout_width="wrap_content"
android:text="Button"
android:layout_toRightOf="@id/btn2"
android:layout_alignParentBottom="true"/>
运行效果图比较:
5.很常用的一点:margin可以设置为负数
相信很多朋友都不知道一点吧,平时我们设置margin的时候都习惯了是正数的,
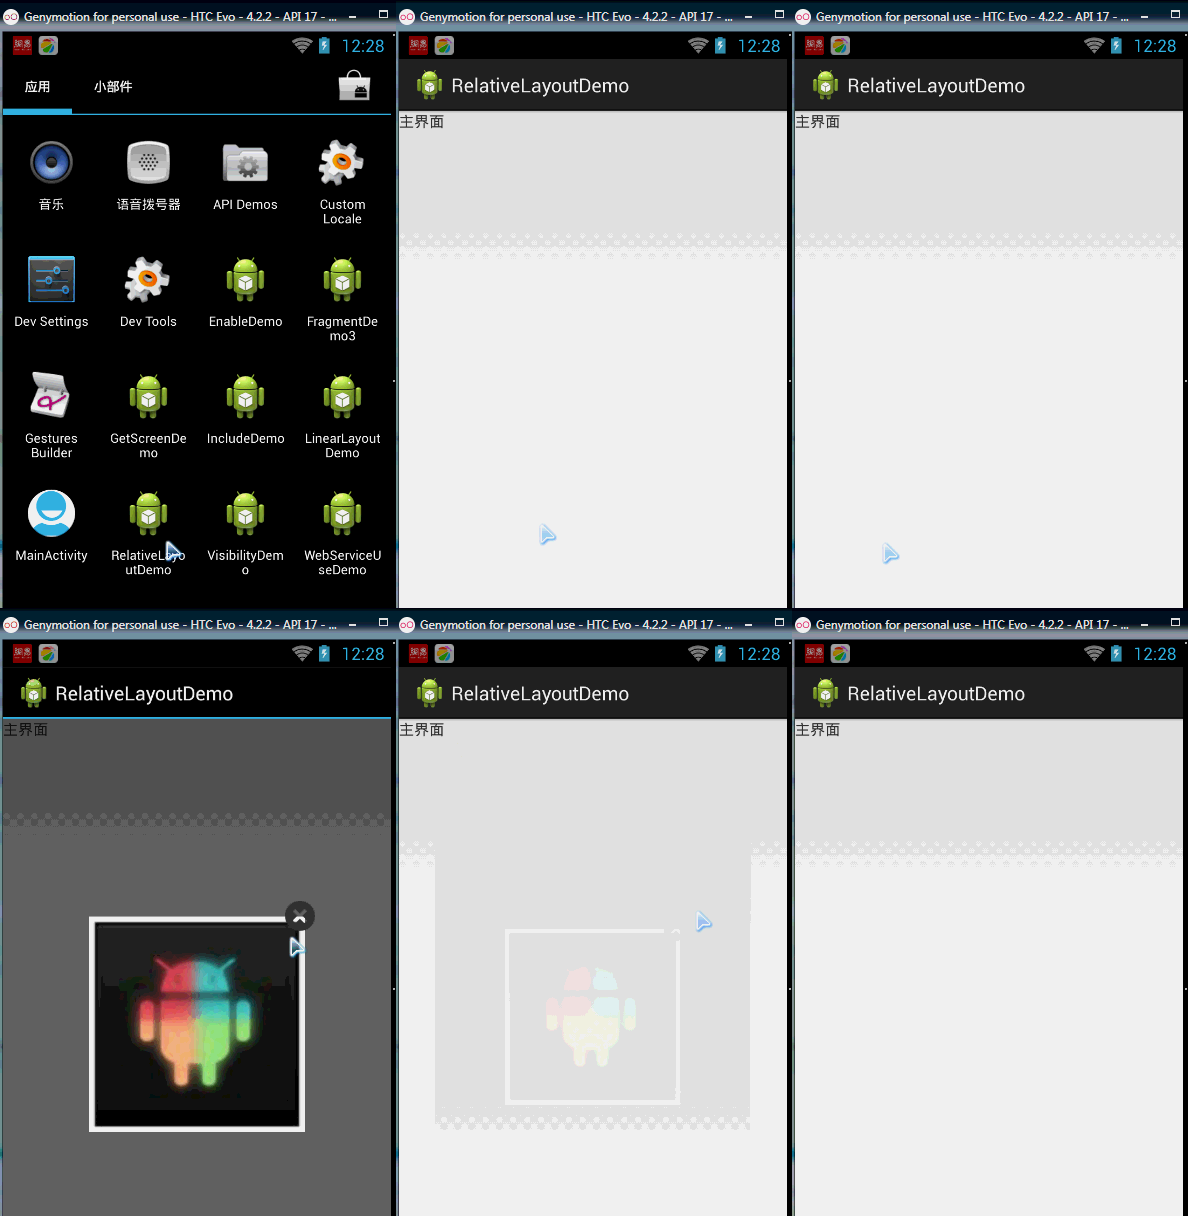
其实是可以用负数的,下面写个简单的程序演示下吧,模拟进入软件后,弹出广告
页面的,右上角的cancle按钮的margin则是使用负数的!
效果图如下:
贴出的广告Activity的布局代码吧,当然,如果你对这个有兴趣的话可以下下demo,
因为仅仅是实现效果,所以代码会有些粗糙!
xmlns:tools="http://schemas.android.com/tools"
android:layout_width="match_parent"
android:layout_height="match_parent"
tools:context="com.jay.example.relativelayoutdemo.MainActivity"
android:background="../style/images/android-tutorial-relativelayout.html">
android:id="@+id/imgBack"
android:layout_width="200dp"
android:layout_height="200dp"
android:layout_centerInParent="true"
android:background="../style/images/myicon" />
android:id="@+id/imgCancle"
android:layout_width="28dp"
android:layout_height="28dp"
android:layout_alignRight="@id/imgBack"
android:layout_alignTop="@id/imgBack"
android:background="../style/images/cancel"
android:layout_marginTop="-15dp"
android:layout_marginRight="-10dp" />
本节小结:
关于RelativeLayout的详解就到这里,有什么纰漏,错误,好的建议,欢迎提出~
最后提供下上面的demo代码供大家下载:RelativeLayoutDemo


